(Where has half of October gone?! These days are flying by with unsettling rapidity. I meant to blog about this a couple of weeks ago, but better late than never. . .)
You may remember that I was so fortunate as to be included in A Charming Exchange: 25 Jewelry Projects to Create & Share, by Kelly Snelling and Ruth Rae. (Or more precisely, some of my cupcake, cookie, and Pop-Tart charms were included in a couple of the totally "charming" projects in that gorgeous book.)
Well, this month Ruth and Kelly are auctioning off the pieces featured in the book-- and they're donating 100% of the proceeds to Susan G. Komen for the Cure. It's a great cause, supporting research to find a cure for breast cancer (October being Breast Cancer Awareness Month).
If you're on the hunt for a one-of-a-kind Christmas gift or just want to treat yourself to something beautiful (and support a worthy cause at the same time), please take a moment to look at the auctions.
The Charming Exchange blog has all the information you need, as well as lots of tantalizing photos of the items up for bid. There are some lovely works of art just waiting for that lucky highest bidder. . .
We'd also appreciate it if you can spread the word to any friends who might be interested.
Thanks so much!
Wednesday, October 14, 2009
Friday, October 09, 2009
Changing Seasons
After a very brief taste of fall, earlier this month, we here on the Alabama Gulf Coast have been plunged back into a late, hot, humid summer. Relief is supposed to come next week. Until then, I'm staying in the A/C and pretending it's autumn. ;o)
This morning, Ponsawan's beautiful autumn-colored acorns were just the thing to help me pretend! These would be lovely in jewelry, of course, but I think they'd also be wonderful in a small bowl or worked into a flower arrangement or an autumn wreath. (Fall puts me in the nesting mood! How about you?)
(I know I've fallen back into silence-- yet again-- but I have at least one more post already in mind to write, so I'll probably be back later today. Maybe if I can get three in a row I'll pick up some momentum!)
Friday, September 04, 2009
Clay Goodies for Chocoholics
This morning, I happened across a yummy piece of chocolate in polymer clay, from Perlenküche.
That's realistic enough to make your mouth water, if you're a chocolate-lover.
One difference I see between it and the real thing (also pictured in the blog entry) is the lower sheen in the clay piece. If desired, a slight shine is easily achieved with a light buffing with a denim rag. However, the more matte finish of the polymer chocolate looks like a lot of real chocolate I've seen. (As usual, it comes down to personal preference.)
The accuracy of the stamped brand name is great, and the edges look just like a tab of chocolate broken off a bar. (Boy, I sure hope any chocoholics who see this have a stash to break into. After looking at those photos, you're probably going to need it!)
Every now and then, I notice photos of polymer clay chocolates from my contacts on Flickr. If you're looking for more chocolatey clay goodies to drool over, Flickr and other photo-hosting sites are good places to search for decadent creations-- both dollhouse scale and larger (frequently worked into jewelry).
Friday, August 28, 2009
Songbird Eggs Tutorial
I've been a bad blogger. I'll continue to try to do better, but we'll just have to see how that works. (g)
If I'm one of your contacts on Flickr, you may already have seen this, but for those who haven't, there's a new tutorial up on Polymer Clay Web.

If I'm one of your contacts on Flickr, you may already have seen this, but for those who haven't, there's a new tutorial up on Polymer Clay Web.
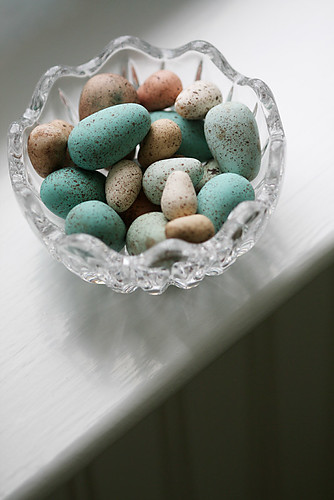
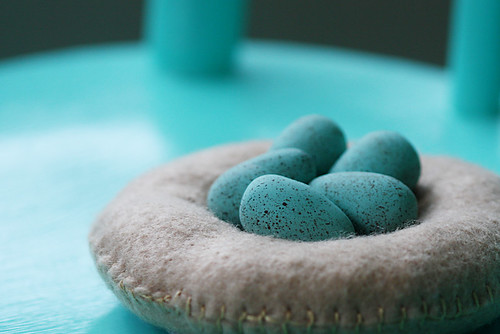
~Songbird Eggs~
For symbols of springtime, life, and new beginnings, few things can compete with the songbird's egg. Softly tinted eggs are a refreshing reminder of unending potentialities in the world around us.
People often puncture, drain, clean, and dye chicken's eggs with beautiful results, but real eggs are delicate. These polymer clay eggs are much more durable, and you can make them in any size or color you want.
With only a few supplies, you can create a whole nest's worth of polymer clay eggs. They make charming decorations for the home, or they can be fitted with an eye pin and worked into unique pieces of jewelry.
This is a simple project ideal for children and those new to clay.
Friday, July 24, 2009
"Chatty Charms" Tutorial
("Chatty Charms?" you say. "Really?" Yes, really. I have a penchant for cutesy names. I'd like to say I've struggled with it, but that wouldn't be true. I've merely given in to it-- alliterated myself into oblivion. Oh well. We all have our faults.)
Today, I added a tutorial for "Chatty Charms" to Polymer Clay Web.
You may, perhaps, be wondering what on earth a "chatty charm" is.
Here's an explanation:

So as you can see, this probably won't be anything new to people who've been claying a while. It's more geared toward those who are still new to polymer clay. That said, I did try out a couple of new (to me) things, in the process of making the tutorial.
First, I sanded some of the antiqued pendants. In the past, I've always just wiped the paint away before it dried completely. I think both techniques have their merits, but I've gotta say, right now I'm really loving the sanding. Wiping away the paint with a paper towel frequently leads to a vicious circle of wiping too much-- having to reapply the paint-- wiping too much again-- and so on. Since you wait for the paint to dry completely before you sand it, it seems a little easier to remove just as much as you want. (On the other hand, with sand paper you run the risk of scratching/removing some of the texture of the piece.)
Second, I tried using a thin coat of translucent liquid clay over an antiqued pendant to serve as a protection and to increase the sheen. I was very happy with the results-- much nicer (in my opinion) than a regular acrylic finish. I prefer the way the liquid clay feels, and there's no mess with brushes or streaky brush marks. Of course, we'll have to see how well it holds up, but I don't foresee any problems.
Well, that's it for me for today!
Happy claying!
Today, I added a tutorial for "Chatty Charms" to Polymer Clay Web.
You may, perhaps, be wondering what on earth a "chatty charm" is.
Here's an explanation:
Do you have something to say to the world? Feel the need to express yourself? "Chatty Charms" can help you spread the word, leaving your mouth free for other, more engrossing pursuits, such as eating ice cream, smooching, or playing the harmonica. (These are of course only suggestions. If you'd rather whistle, stick out your tongue, or savor some chocolate instead, I won't tell.)
Ideal for beginners, this project relies upon a couple of very basic but versatile techniques. Stamping and antiquing are useful in a variety of other applications, and this is a fun way to familiarize yourself with them both.
Put your monogram on a pendant— create handy label-style keychains— engrave favorite quotations on fridge magnets! Choose words of inspiration, pile on the sarcasm, or opt for something completely off the wall! It's such a simple yet rewarding technique, you'll find it hard to stop.

So as you can see, this probably won't be anything new to people who've been claying a while. It's more geared toward those who are still new to polymer clay. That said, I did try out a couple of new (to me) things, in the process of making the tutorial.
First, I sanded some of the antiqued pendants. In the past, I've always just wiped the paint away before it dried completely. I think both techniques have their merits, but I've gotta say, right now I'm really loving the sanding. Wiping away the paint with a paper towel frequently leads to a vicious circle of wiping too much-- having to reapply the paint-- wiping too much again-- and so on. Since you wait for the paint to dry completely before you sand it, it seems a little easier to remove just as much as you want. (On the other hand, with sand paper you run the risk of scratching/removing some of the texture of the piece.)
Second, I tried using a thin coat of translucent liquid clay over an antiqued pendant to serve as a protection and to increase the sheen. I was very happy with the results-- much nicer (in my opinion) than a regular acrylic finish. I prefer the way the liquid clay feels, and there's no mess with brushes or streaky brush marks. Of course, we'll have to see how well it holds up, but I don't foresee any problems.
Well, that's it for me for today!
Happy claying!
Everything You've Always Wanted to Know About Polyform Clay ;o)
Well, maybe not quite everything, but Angela's (aka CraftyGoat's) most recent blog entry does bring up some interesting points. She shares her notes from a Q&A session Polyform offered at the IPCA retreat, so this is very fresh information. I highly recommend giving it a look, if you haven't already-- especially if you regularly use any of the Polyform clays (SculpeyIII, Premo, Studio by Sculpey, etc.).
I was surprised to read that Premo no longer contains phthalates. I'd heard that Kato Clay had made the switch, but nothing about (most of) Polyform's lines of clay. I'm not sure how I feel about that. If the phthalates really were a significant health risk, then of course it's good to avoid them, but I always wonder how much things of this nature may be blown out of proportion. I also wonder how much of a reduction in shelf life we should expect, now that so many brands are going phthalate-free... (This makes buying in bulk and/or stocking up during clay sales seem a bit more risky. Better get busy using up some of my more recently stock-piled clay, huh? (g))
It was also interesting to read that the recommended temperature is a little bit lower than what you need for optimum strength. (Apparently the manufacturers prefer to err on the safe side. Can't really blame them there, but it's good to have the facts.) I guess people knew what they were talking about, all these years, when they've said you're ok if you don't go over 300 degrees. I know I often find my oven's temperature tends to creep up higher than 275, but I've only scorched something once, and that was because it was too close to the heating element.
Anyway... Good stuff to know! Thanks for sharing the info, Angela!
Tuesday, June 23, 2009
Curing in Stages
As I was working on something at my clay table, recently, it occurred to me how much of my work is cured in stages. I can't recall how long it took me to give multiple curings a try, but it has proven to be nearly essential for what I do.
Even if you're fairly new to polymer clay, you've probably read that it's possible to cure things in stages-- to adhere raw clay to cured (baked) clay and put the piece back into the oven-- but you may not see why you'd ever want to do that. After all, it takes time to cure and wait for a piece to cool, and we're all about instant gratification, these days. For many projects, a single curing is all you need. However, there are times when curing in stages is very much worth the extra time and effort involved.
Here are a handful of reasons to consider curing polymer clay pieces in stages:
First, you'll have to decide, on a case by case basis, whether you trust the adhesion between the raw and cured clay to be sufficient. In many cases, it will be. However, when adding larger pieces-- or when the raw and cured clay share only a small surface connection-- you'll probably want to give the connection a little boost. You can use a dab of liquid clay (translucent, usually, but not necessarily) between the raw and cured clay. (Once cured, the liquid clay strengthens the bond between pieces.) You could also add a mechanical joint, such as a twisted piece of wire cured into the first piece and embedded into the second. Another option is curing the second (or third, or fourth) piece of clay separately and attaching it later (after everything has cooled to room temperature) with a cyanoacrylate glue (super glue).
Second, depending on your project and your plans, you can choose either partial curing (curing just long enough to firm up the clay and prevent it from taking fingerprints or dust) or complete curing (curing to the full length of time recommended by the manufacturers for the size of the piece). Partial curing is of course faster, and if you're going to finish the project and re-cure quickly, it's a perfectly good option. Also, there is less risk of color shifting than if you cure the "base" twice the required length of time. (You can reduce color shifting by using an aluminum foil "tent" over your pieces when you cure them and by mixing a little white or other opaque color of clay into colors that tend to shift.) On the other hand, complete curing makes the piece stronger-- less likely to break during any stresses it may encounter prior to final curing. If you plan to leave the piece for a very long time before returning to complete it, it may be wise to cure it completely. I've read horror stories about (accidentally) partially cured clay eventually crumbling (supposedly under the "attack" of unset plasticizers). It's up to you to decide which option is best for your particular set of circumstances.
Even if you're fairly new to polymer clay, you've probably read that it's possible to cure things in stages-- to adhere raw clay to cured (baked) clay and put the piece back into the oven-- but you may not see why you'd ever want to do that. After all, it takes time to cure and wait for a piece to cool, and we're all about instant gratification, these days. For many projects, a single curing is all you need. However, there are times when curing in stages is very much worth the extra time and effort involved.
Here are a handful of reasons to consider curing polymer clay pieces in stages:
- Ease of Handling. Keeping clay free of fingerprints, nail marks, and other undesired textures can be a challenge-- even when wearing latex gloves (which can themselves leave textures and marks). Pre-curing a portion of your project-- a base, for example-- gives you a firm handle by which to hold and rotate the piece while you work on the remainder of it.
- Preventing Dust. As long as clay is "open"-- that is, uncured or raw-- it seems to act like a dust magnet. Even if you're careful about covering uncured pieces between claying sessions, it's common to find stray bits of dust, fluff, and so on that have somehow landed on your project. Removing them can be tedious. Whenever possible, you can prevent dust from ruining your work "so far" by partially curing it. Dust may still settle on cured pieces, but it's easy to wipe away when you're ready to recommence work (or play).
- Setting the Plasticizers. One of the reasons we condition polymer clay before sculpting it is to be sure that the plasticizers (the chemicals that make the clay malleable) are evenly distributed through the clay. You may have read (or noticed on your own) that even after clay has been conditioned, it can return to its original (right out of the wrapper) firmer state after it's been sitting around for a while. This is because the clay has cooled and the plasticizers have settled. It's a simple matter to recondition a ball or slab of clay-- just roll it through the pasta machine or scrunch and roll it between your hands. However, it's not such a simple matter to recondition clay that has been formed into a special shape and left to sit for weeks or months. You may cure such a piece and never have a problem, but some suggest that, if the plasticizers settle to the bottom of the clay, the strength of the clay may be reduced. Particularly if you plan to sell or give your work as gifts, you want to be certain that it is as strong and durable as possible. For this reason, I personally prefer to "set" the plasticizers in place by curing sooner rather than later. (When I've neglected to pre-cure, I've even scrapped partially constructed pieces-- putting the clay back to the recondition step-- rather than risk a weaker finished product.) Once cured, pieces can wait weeks, months, or even years for you to get around to the next step in your process.
- Ease of Cleaning/Working on a Solid Surface. For some techniques, I find that a solid surface (cured clay) is easier to work with than a soft one (uncured clay). For instance, when I make faux ceramics, I prefer pre-curing the textured "base" before applying the tinted liquid clay. This makes it easier for me to handle without fear of leaving fingerprints. It also means I can more easily wipe away the liquid clay, should I change my mind after applying it.
First, you'll have to decide, on a case by case basis, whether you trust the adhesion between the raw and cured clay to be sufficient. In many cases, it will be. However, when adding larger pieces-- or when the raw and cured clay share only a small surface connection-- you'll probably want to give the connection a little boost. You can use a dab of liquid clay (translucent, usually, but not necessarily) between the raw and cured clay. (Once cured, the liquid clay strengthens the bond between pieces.) You could also add a mechanical joint, such as a twisted piece of wire cured into the first piece and embedded into the second. Another option is curing the second (or third, or fourth) piece of clay separately and attaching it later (after everything has cooled to room temperature) with a cyanoacrylate glue (super glue).
Second, depending on your project and your plans, you can choose either partial curing (curing just long enough to firm up the clay and prevent it from taking fingerprints or dust) or complete curing (curing to the full length of time recommended by the manufacturers for the size of the piece). Partial curing is of course faster, and if you're going to finish the project and re-cure quickly, it's a perfectly good option. Also, there is less risk of color shifting than if you cure the "base" twice the required length of time. (You can reduce color shifting by using an aluminum foil "tent" over your pieces when you cure them and by mixing a little white or other opaque color of clay into colors that tend to shift.) On the other hand, complete curing makes the piece stronger-- less likely to break during any stresses it may encounter prior to final curing. If you plan to leave the piece for a very long time before returning to complete it, it may be wise to cure it completely. I've read horror stories about (accidentally) partially cured clay eventually crumbling (supposedly under the "attack" of unset plasticizers). It's up to you to decide which option is best for your particular set of circumstances.
- - - - - - -
I think that covers the basics. If you've never tried curing in stages, maybe it's time!
Tuesday, June 09, 2009
Back From a Long Absence
I'm not sure if anyone still visits this blog, these days. (g) Still, I guess it's never too late to try to get back in the habit of occasionally blogging about polymer clay.
Just as I haven't been blogging clay, neither have I been keeping close tabs on all the latest clay news. However, I have taken a peek, now and again.
I was surprised to hear about Pardo-- another brand of polymer clay that is new to the American market-- and then Sculpey's new Bake Shop Oven-Bake Clay, which is a kid-friendly clay designed especially for children. (Angela Mabray-- aka CraftyGoat-- recently posted a review of Bake Shop.) I'm all for new clays (even though I still haven't even tried that formerly new brand, Studio by Sculpey), but I do hope "the powers that be" won't mess around too much (more than they already have) with the established brands.
I've never done much caning, but for a while I've kept it in the back of my mind as a "maybe someday". "Maybe someday I'll really dive into canework, instead of just feebly dabbling." Well, I've noticed a lot of chatter on clay blogs about a new technique that might make my (potential) future as a canework convert that much more interesting. I assume that most readers will already have seen this, but for those who haven't (and for my own future reference), here's a demonstrative video from PolyClayPlay:
This technique was developed by Idit Zoota. Essentially, the idea is that, instead of packing an irregularly shaped cane (like a flower) with translucent clay to aid in reduction, you can pack it with simple Play-Doh (or another water-soluble modeling material). Reduce as usual, then pull away the Play-Doh. Because it doesn't adhere to the polymer clay-- or at least not nearly as strongly as polymer clay sticks to itself-- you should be able to remove most of it easily. Stubborn bits can be soaked in water and gently brushed away with a soft brush.
Pretty neat, huh?
See, this is the kind of thing I've been missing out on! ;o)
Subscribe to:
Posts (Atom)