Sunday, December 21, 2008

Tutorial: Gingerbread Cookies

As usual, I'm running late, but there's a new holiday-themed tutorial available on Polymer Clay Web. It's our version of gingerbread:


Ever since I made "gingerbread cookie" ornaments and pins for some family members, last Christmas, I've been meaning to fix up a tutorial for this holiday season. Well, I guess that I did. Technically. (g) At least it's there for next year, right? And who says you can only make gingerbread in December? Seriously, these go together pretty fast, and I bet they'd be lots of fun to make with the kids or grandkids.


Now, back to the clay room. I have some gifts to finish by Wednesday! (Can she do it? Will she have to stay up until the wee hours to accomplish her gift-giving goals? Stay tuned to find out! ;o)) I hope you're all enjoying the holidays and not stressing out too much!

Wednesday, December 03, 2008

Use Up Those Spare Beads!

Note: Yes, I'm finally back on my polymer clay blog again (!), and I hope to manage to pop in at least once a week for a while before my next unannounced months-long disappearance. ;o) Sorry to have been gone so long, but you know how it is. After you've been quiet a few weeks, it's hard to get back in the habit of blogging. Anyway, on with the clay talk!

If you're anything like me, you've probably amassed quite a collection of polymer clay beads over the years. Many of these are leftovers from old projects and early clay obsessions. (For me, it was crackled paint.) What can you do with all those beads when you have just one like this and only three like that? Plenty! Here are a few ideas to get you started!
  • Make earrings. If you have matching pairs of beads, this is an obvious solution to using up extra beads.
  • Set them off with metal and glass (or plastic). Mixing beads made of other materials in with your polymer clay beads stretches them. Also, this helps use up some of your store-bought stash!
  • Make crazy, wild jewelry. (The craziness and/or wildness of your jewelry will depend on the craziness and/or wildness of your beads.) Mix and match beads for an eye-catching necklace. Combine beads with a similar trait (all faux naturals/organics, all from the same color family, all the same shape, etc.)-- choose a focal and pick beads that coordinate with it-- or go truly wild and put a little of everything together into one zany piece. (Maybe make a game of it. Pour all the beads into a bowl and pick them at random. Do you dare?)
  • Turn the spotlight on them. Give them another look. Are any of them especially nice on their own? Even one solitary bead can make a striking accessory. One beautiful bead as a pendant or strung directly onto a leather thong makes a simple but powerful fashion statement.
  • Turn a single bead into a ring with wire-wrapping. (Be warned: This can lead you into a whole new artistic obsession!)
  • Make beaded bookmarks (a.k.a. book thongs). All you need to make several unique book marks is a selection of (preferably large-holed) beads and some thin ribbon. Cut the ribbon to the desired length. (One and a half to two feet is a common length. Adjust to suit the size of books you wish to use the book mark in.) Apply Fray Check (or plain old white glue, in a pinch) to the cut ends and let dry. Knot one end of the ribbon (double knot, if needed) and string on your chosen beads. (Usually two or three per end will do, but it's a matter of personal preference.) Knot the other end. If desired, knot the ribbon again just inside the strung beads, to prevent them from all sliding to one end of the ribbon.


If all else fails you can always make more beads to match or coordinate with the ones you have left. Sure, you may end up with even more beads rolling around your house, but you're sure to have fun in the process!

Monday, July 07, 2008

Handmade Texture Tools

As I wrote yesterday, playing around with texture wheels got me in the mood to finally turn some odds and ends I'd collected into real texture tools with polymer clay handles.

Here are the results:


Though you can't really tell in this photo, most of them are double-ended. I have to admit that I have yet to try them out in their finished form. I was just too eager to post about them. (g) (See? I really am getting back into this blogging thing.)

I know people have been turning bits and pieces into texture tools for years. There's nothing cutting edge about it. Still, I have a feeling that there are many others like me who've heard or read about it, thought about it, maybe even gathered promising random bits of metal-- but never actually done it. For anyone interested in what I learned along the way, I've put up a brief tutorial on Polymer Clay Web: Handmade Texture Tools.

Some people enjoy making their tools pretty, and when I made polymer clay handles for my linoleum cutters, I did put a little effort into making them attractive. However, this time I enjoyed not having to worry about that for an afternoon. It's a little vacation from thinking about fingerprints, color combos, and aesthetics in general. Functionality was the only thing on my mind when I made these. Ah, so freeing to use the ugliest "mud" imaginable and not care that it was hideous! ;o)

Sunday, July 06, 2008

Latest "Stuff"

Um, I did say-- a couple of weeks ago, was it?-- that I was going to post more regularly, didn't I?
Ha ha ha! Silly you for believing me! ;o)

No, seriously, I am going to get back into the swing of things. Starting right now!

Though I've been quiet here on this blog, I have put in some time at the clay table. For instance, I've been trying out some new ideas with buttons, such as these "jumbo-sized" buttons:


There's nothing for scale in the photo, but trust me-- they're bigger than my usual buttons. (g) If I remember correctly (not guaranteed, especially when it comes to measurements and numbers in general), the hearts are about 1.25 inches "tall".

I've also been working on some cupcakes:


It's always satisfying to get a group of things done at once. A handful of beads, cupcakes, whatever looks so much more impressive than one-- and they're fun to photograph this way, too. ;o)

Then I got the latest issue of Polymer Cafe and read Irene Semanchuk Dean's interesting article about homemade texture wheels. I decided to give it a try, and she's right-- you will want to make more than one. I'm going to have to make another batch, sometime soon. . .


This little adventure got me in the mood to finally turn various bits and pieces I've been collecting into full-fledged polymer clay tools. I baked several of them this morning and am looking forward to trying them out.

I hope you've all enjoyed a pleasant weekend (a long holiday one, for those of us in the U.S.)! :o)

Monday, June 23, 2008

Couple of Button Photos

Posted a couple of button photos over the weekend. . .

Earthy Appeal

Tropical Sunset Buttons

Otherwise, I haven't taken many clay photos, lately.

I have a couple of custom orders that I'll try to finish up today. (They're mostly re-dos of things you'll already have seen-- a hot dog and sugar cookies.) Meanwhile, I need to get back in the habit of photographing and listing things regularly. I was doing alright for a while, but I've slacked off for the past week or two. (Got busy with other things. Was also sidetracked by a foray into crochet. Beginning to suspect that crochet might bring on carpal tunnel syndrome, so may not do much of that!)

I do have more finished buttons to photograph-- and many in-progress buttons. There are also plans for a larger production of cupcakes and some other miniatures.

I think I'm "sounding" as blah as I feel, this morning. (g) Sorry about that. I've just walked up to the mailbox and back, and I haven't fully recovered yet. ;o)

In the mail this morning:
  • A package of beads headed for the Beads of Courage program.
  • Five buttons to be photographed for possible inclusion in an up-coming magazine. (We'll see what happens. I'm trying not to get my hopes up, in case they decide not to use them. Besides, it's flattering just to be considered.)
I'm feeling sleepy this morning. . . Probably time to get out of the computer chair and move around a while!

Hope you all had a pleasant weekend. :o)

Friday, June 20, 2008

Testing the Waters. . . ;o)

It's been a while since I posted regularly here at my "mostly polymer clay" blog. Maybe it's time to stick a toe in the water and ease my way back into the blogging groove.

So to start things off, how about a couple of links?

I'm finally resigned to the fact that I can't keep up with all the great blogs out there. I'll try to read them as often as possible, but I'm sure to miss lots of things. Anyway, today I was catching up on a few blogs, when I came across Paula Pindroh's "documentary" of the sculpture of an unusual breed of dog-- the Chinese Crested. You can see more of her adorable dog sculptures in her Etsy shop.

I'm a dog lover, so how about another dog-related link? Here's another one from Etsy. IttyBittiesForYou (Jennifer) offers "Your Dog as a Superhero"-- a cute little sculpture of a masked, caped canine made in the likeness of your own pup. What a fun idea! (g)

Hee hee. That reminds me of "Bark Kent"-- a stuffed dog my youngest sister had. He was sewn in a lying-down position that was well suited to "flight", and well, you can guess the rest. ;o)

Well, I think this has helped get me back in the clay-postin' mood. I'm feeling hopeful, at least! :o)

Wednesday, June 18, 2008

Hobby Snobbery

Donald and I were talking over the weekend about how funny it is that no matter what "subject" or hobby you choose-- no matter how obscure it may seem-- you always seem to find that there's already a "community" in place. Somewhere out there is a group of people with very strong opinions about the hobby, whatever it may be. And for some of these fanatics (for whom the flugelhorn or the knitting of leg warmers for dogs is serious business) it goes beyond strong opinion right into snobbery. (What?! You use acrylic novelty yarn to knit your canine leg warmers?! Disgusting! I use only the finest alpaca wool. Anything less makes me shudder just to think of touching. And besides, Fifi refuses to wear it if it's not $$$ Brand. She has such superior tastes-- even by poodle standards!)

Some people!
Give them anything and they'll find a way to make a competition-- a hierarchy-- an "if you don't do it like we do it, you're not cool" clique.

Thank goodness for us sane ones, right? ;o)

Friday, May 30, 2008

Hand-Carving Stamps

Strictly speaking, this post isn't about clay, but it involves something you can definitely use with clay-- hand-carved stamps!

Most recent stamps

I once thought carving stamps would be difficult, but it's actually very do-able. (Not to say that I'm now an expert, but I've been able to carve stamps that I'm happy to use.) It's also quite a bit of fun!

Here are a few quick pointers:
  • Invest in the right tools. (This is especially true if you think you'll want to be carving on a regular basis.) As with so many other things, having the correct tools makes stamp-carving much more enjoyable. Some people can carve detailed stamps with nothing more than a craft knife, but most of us have better control with linoleum cutters. (You can also use them to carve cured polymer clay!)
    • Remember: 1) It is recommended that you carve with the sharp end pointed away from you. 2) Go slowly. It's easy to go back and remove more later, but if you carve too much, the damage is done. 3) Most people prefer moving the material that's being carved rather than moving the carving tool. Hold the tool more or less "still" and maneuver the carving block underneath it.
  • Keep the sharp tools away from kids and pets. This probably isn't the best craft for kids. Unless they're old enough to chop vegetables and peel fruit, they probably shouldn't be trusted with linoleum cutters. However, you could always let the kids draw the design, then have an adult carve it for them.
  • Find a quality carving material. There are a variety of products out there made especially for carving-- as well as erasers, which can also be carved-- but they're not all created equal. I've only tried a couple, so far. Speedy-Cut (which is a pale cream/beige) carves very easily, but it is crumbly, which means that your finished stamps will also be prone to crumbling. After you put all that time into making a stamp, you probably want it to last, so it's worth paying a little more for something better. I've just started working with Speedy-Stamp ("the pink stuff"), which has a better reputation than Speedy-Cut. So far, it does seem better. Maybe a tiny bit firmer, but still pretty soft-- and much less crumbly.
  • Set reasonable expectations. As a beginner, it's best if you don't start out with a huge, complicated pattern. Instead, let a simple shape be your first project, then go from there. If you like a slightly "rough-hewn", rustic, even "primitive" style, you'll probably love this craft immediately. If you want detailed stamps with smooth, thin lines, you'll need more patience (and practice).
It's a fairly simple process, carving a stamp. It requires more patience than anything else. I'm sure there are plenty of great resources out there, online. Here are just a handful of tutorials to help you get started:
Good luck, and have fun! :o)

Friday, May 23, 2008

Button Bakery

All buttoned up. . . ;o)

Dusky Butterfly Button

Ever since I started experimenting with buttons-- mainly for the benefit of a few family members who were interested in making their own polymer clay buttons to use in quilts-- I've been more or less hooked on buttons.

Glittering Granny Smith

I spend more time thinking about making buttons than jewelry, lately. This is probably partially a "honeymoon period" type thing, but I fully expect to come back to buttons every so often-- just like I do with my other pet projects (mokume gane, mini food, etc.).

Teensy Trio of Baby Buttons

I've even opened a second Etsy shop-- The Mossy Owls Button Bakery-- where I'll be offering some of my buttons and other sewing-related creations. I have no idea what kind of market there is for handmade buttons, and I'm still feeling things out, but it can't hurt to try. :o)

Luscious Teal Pair

If you'd like to see more button-y photos, you can check out the shop (linked above) or the button set on my Flickr. :o)

P.S. I don't know why it is, but Blogger seems to think I'm in a different time zone than I actually am. When I try to publish entries with a time stamp that's several minutes old, it still thinks the entry is "post-dated", and tells me it will publish it later! Pretty annoying, especially since I've checked the time zone setting, and it appears to be right. . .

Thursday, May 22, 2008

Faux Leather Tags

I wanted to make some faux leather bookmarks for gifts, earlier this month, so I played around with a few things and came up with a "recipe" that I liked.

I thought the resultant bookmarks looked and felt like real leather. The recipients thought they were leather-- or at least acted like they did. (Maybe they were trying to give me an ego boost. ;o)) If the faux leather only smelled like the real thing, they'd be perfect. (g)

After making a few bookmarks, I had the idea to make a faux leather tag. I think it was some stamps that I had that got me started thinking about tags. I have some stamps meant to be used with "journaling" or captions in scrapbooks, and they were just the perfect size to be fancy borders for tags.

So I stamped a sheet of the textured clay, put in a few initials, cut out a tag shape, went through the rest of the process-- and I have to admit, I was smitten. I don't think I really need lots of tags around the house, but I'm probably going to be making them anyway. ;o)

(Here are some of the tags I've made so far. That first one's not here. It was a gift, and because I was working right up until the last minute-- shame on me!-- I didn't have time to get a photo before I gave it away. . .)

Faux Leather Tags

I love things that look like they've been around forever, so this is right up my alley!

Here's a link to the project on Polymer Clay Web: Faux Leather Tag

I wrote it for tags, but of course you can adapt it to whatever you'd like-- bookmarks, jewelry components (embossed faux leather cuffs?), boxes, photo frames. . . I think I've even seen someone make a faux leather book cover from polymer clay. (I need to learn how to bind my own books. I once made a book cover out of a butter box, but that's been my limit, so far. (g))

I think the style of the stamps you use might be a key to success with this technique. I may be wrong, but I get the feeling that if the stamp (or whatever you use for texture) looks like something you typically see in real leather, it's more believable. You could use actual leatherworking tools, if you have them.

[Hm. Google "leatherworking" and you get lots of links about World of Warcraft and related things. I know nothing about that game, but there certainly seems to be a huge Internet community devoted to it. Makes sense, I guess. . . given that it's the Internet. ;o)]

Well, enough of that. Now I need to go find an excuse to make some tags. . . (g)

Wednesday, May 07, 2008

Sticky clay!

I had trouble with too-soft clay, today.

The clay started out a bit on the soft side, right out of the package, but the warmer weather is making it even worse. I'm resorting to leaching, which I hardly ever do. I suppose I could try switching to a firmer brand of clay, but I'm stubborn and prefer to buy my clay at sale prices. . . I may have to start refrigerating projects between "steps".

I'm playing around with the faux leather technique, combining instructions from Carol Blackburn's beautiful bead book and Irene Semanchuk Dean's lovely faux surfaces book-- then putting a little of my own twist on things. Nothing anywhere near done, yet. I'm having fun with it, but it'd be nicer if the clay wasn't a goopy mess. :oP Well, I've been leaching away, so I hope to see some improvement.

Monday, May 05, 2008

Crayons in clay!

"Vineyard Pastels" Beads

One of the techniques I've played around with over the past month or two is using crayon shavings as inclusions in translucent polymer clay. It's lots of fun and extremely easy-- a great project to share with kids (though you'll want to chop the crayons for them, if they're very young).

I first read about this technique on Lindly Haunani's website. Here's a link: Altering Polymer Clay with Inclusions. She discusses a variety of other inclusions, too, so it's a good read if you're new to the idea.

Here are a few things I noticed and/or did when I made my crayon-inclusion beads:
  • As Lindly points out, some of the colors can be unpredictable. They may not come out of the oven exactly the same as they went in. Some intensify; others seem to fade. This isn't a problem if you're just having fun, but if you require specific results, you'll want to bake some test chips.
  • I used very cheap "off-brand" crayons bought on sale. They're pretty worthless as crayons-- very poor performance in coloring books, etc.-- but they still make good inclusions. So if you have a box of poor quality crayons, you might consider trying this technique with them.
  • I took shavings from the crayons, then chopped those into small bits before mixing into the clay. I then used a craft knife to further chop any larger pieces of crayon in the clay mix. It's not always necessary to chop the crayons that much, but it is the look I prefer. However, all that chopping can be time-consuming and tedious. I don't know how well a food processor would work with crayons (seems a bit messy), but it's an idea, if you need a lot of crayon chopped finely.
  • I added some embossing powder into my mix for a different look. The beads in the photo above have seafoam white embossing powder as an inclusion in addition to the crayon shavings.
  • Maybe it was just a lucky chance-- a good batch of clay, cool/dry weather, a fortuitous alignment of the stars ;o)-- but it seemed to me that these mixes of clay were slower to take fingerprints than regular ("inclusionless") clay. Adding certain inclusions (especially powders) does seem to "dry" the clay out a little, which makes it easier to avoid fingerprints-- and the slightly uneven surface resulting from these types of inclusions may make it less obvious if there are prints.
If you haven't tried combining crayons with clay, maybe now's the time. Those tantalizing boxes of color are perfect for getting you in the mood for the approaching summer-- and you probably have everything you need already on hand.

Wednesday, April 30, 2008

Cupcakes Galore!

There are cupcakes galore in my clay room, right now! Vanilla, strawberry, chocolate-- purple, green, and pink-- glittered, "confettied" and candy-sprinkled!


And these are just the ones that are done. I have probably twice as many cupcake bases waiting for the cake, icing, and decorations. Waiting for me to get back into a cupcakey mood. (I must be due for one soon, it's been so long since the last one came and went.)

I've had these finished cupcakes sitting around for months. I thought about taking a photo of them now and then, but it was always a bad time-- insufficient lighting, usually, and me too lazy to set up some decent artificial light. So of course now that I finally decided to snap a photo, it didn't turn out that great, anyway. (g) Oh well. That'll give me more incentive to take some good photos soon.

. . . Maybe? ;o)

First Button Test -- Results!

A looong, looong time ago ;o) I wrote about the fact that I was learning more about making buttons with polymer clay. Initially, it was to prepare myself for any questions some family members might have if/when I taught them how to make buttons for their quilts. (Still haven't done that. I'll have to check and see if they're still interested.) Now I've gotten more interested in the buttons for my own sake. Actually, I'm kind of obsessed with buttons, for the time being. (g)

Anyway, I made up a few test buttons and decided to put them through some tests. I wanted to see how different "finishes" would hold up through multiple washings and dryings, so I sewed them to a scrap of fabric and tossed them in whenever I did a load of laundry. They've been through many washings and heated dryings, by now. I stopped counting at around ten, but I kept putting them in with the laundry. It's probably more like fifteen or twenty, total.

They've been swirled around in the washing machine and knocked about in the dryer. They've been in repeated contact with regular detergent and fabric softeners (both liquid and sheets)-- but I kept them out of loads I washed with bleach. (The bleach might not have been a problem, but I didn't want to be too hard on them, and bleach isn't something you have to use with most laundry.)

And the results?
For the most part, they're fine. In fact, with one exception (which I'll get to in a minute), they're perfect!

Here they are-- the cleanest buttons this side of the Mississippi! ;o) (As usual, you can click on the photo to see it bigger. It's not a fabulous photo to begin with, but it gets the point across. (g))


Starting with the top left and working clockwise:

1) Plain, unvarnished clay.

2) White clay highlighted with mica powder, then glazed with tinted liquid clay.

3) Acrylic paint crackled on metallic clay. Only the top was coated with clear liquid clay.

4) Acrylic paint crackled on metallic clay. Nothing on top of crackled paint.

5) Acrylic paint crackled on metallic clay. MinWax Polycrylic over the whole button.

6) Acrylic paint crackled on metallic clay. Clear liquid clay over top and sides of button.

I had feared that the unsealed crackled paint might begin to loosen or flake away, but it turned out that the only button I had a bit of trouble with was the one coated in Polycrylic (a product similar to Varathane)-- and even that one isn't too bad (as you can tell from the photo). It just began to peel very slightly on one side. I can think of a few possible explanations for this problem. Maybe it needed longer to dry (or go back into the oven for a little while). Another coat might have strengthened it. Or it could be that it just isn't the best product to use on something that's going to be put through the washer and dryer. I'm not a big fan of varnishes to begin with (I usually only resort to them when I "have" to), so I'm not likely to run more tests with Polycrylic.

Today, I started another test with a few different buttons. I'm curious to see how that'll turn out. . . Two loads in, the "subjects" are still looking good. Who knew laundry could be so interesting?! ;o)

Edited to add:
Treasurefield wondered what brand of clay I used for these buttons. (Thanks for asking! :o))

Oops! That might have been worth mentioning, huh? ;o) I used Premo for all the "regular" clay. The liquid clay I used was Kato brand. I imagine TLS would have produced similar results (as far as durability goes), but I wanted the best clarity I could get-- thus the Kato. (For European clayers or anyone else who can't find Kato-- Fimo Decorating Gel/Fimo Liquid is supposed to be comparable to Kato for clarity-- maybe even better.)

I haven't tried making buttons from any other clay, yet. I would expect Kato to yield buttons at least as sturdy as these. Fimo Classic would probably be fine, too-- but I have to admit that I'm a little wary of Fimo Classic after all the talk (a year or two or three ago? (g)) about the new, softer formula. However, we all know that Premo's been reformulated into mushiness, too, so. . . *shrug* When in doubt, it's always best to run a small test first.

Tuesday, April 22, 2008

More recycling ideas (on other blogs)!

It feels like forever and a day since I posted a non-10-on-Tuesday entry here! I've either been down (my sweet Eskie-dog died unexpectedly last month) or busy or obsessed with other things ("nature photography", scrapbooking, patio-planning). There's been claying going on, but I haven't photographed it, and I wanted to wait to write about it until there were photos.

Anyway, there will be some more real blog posts soon-- and maybe a break from the Ten on Tuesday thing. It's been feeling more and more like a chore, which translates into less interesting posts-- so maybe I need to focus more on other things. We'll see. . .

For now, if any of you haven't already seen it, Angela (CraftyGoat) has a recycling-related post (with links to other similarly themed articles) on her blog, today.

(Reading blogs is another thing I've fallen [even farther] behind on. It's mainly thanks to Flickr's "From Your Contacts" feature that I saw this in a "timely fashion". Must catch up on blog-reading! Too much fun stuff to do, too little time!)

Ten on Tuesday: Earth Day Edition

While people differ in their opinions of how best to accomplish it, most folks want their environment to be as clean, healthy, and beautiful as it can be. Whenever possible, we try to make lifestyle choices that work in that direction. Here are ten ideas of ways we clayers can reduce our consumption of raw materials. Many of them have the added benefit of easing the burden on our wallet, too!

Ten on Tuesday: Earth Day Edition

1. Use "cardstock"-style food packaging instead of specially purchased materials. Most boxes that food is packaged in can be used for this purpose-- cereal boxes, the boxes that 12-pack colas come in, etc. Use this cardstock to make accordion-folded bead curing racks, in flat sheets to prevent shiny spots when curing (weigh down the corners to prevent curling), to protect your work surface when painting the clay, etc. (It's best to put raw clay in direct contact with only "unmarked"/uninked paper or cardstock. Clay can sometimes pick up inks, so just use the plain, raw side of the package.)

2. When painting polymer clay, use the lids from old food containers-- yogurt, butter/margarine, sour cream-- as makeshift paint palettes. These lids (and their containers, depending on how much product you need) can also be used when you're mixing or applying glitter to polymer clay-- and in a variety of other situations. Wash them up with a little soap and water, and they can be reused almost indefinitely.

3. Never throw away polymer clay. (It's hard to believe that anyone would, but you never know.) Even scraps and ugly, muddy mixes are valuable. Scraps can be mixed together (with a careful eye) to make very attractive custom blends, and ugly clay can still serve a purpose as bead cores or in other applications where they can't be seen. Not a bead-maker? Use ugly mixes to make homemade texture sheets or stamps-- or as handles for homemade or "found" tools (if you aren't particular about how the tool looks).

There may be hope for even cured clay in projects that didn't quite turn out like you expected. Failed projects can sometimes be used as armatures for another skin of clay. If nothing else, you can use a grater or a craft blade to "shred" the cured clay. Chop (by hand or with a clay-dedicated food chopper) into bits small enough to use as inclusions in raw clay.

4. Use things you'd ordinarily throw away in your clay work. For instance, you can achieve all sorts of interesting effects with inclusions in translucent clay. Here are a few possibilities: dryer lint, past-their-prime (or last bit in the bottle) spices, dried flowers/leaves (when bouquets have finally faded and shriveled), and tiny stubs of crayons (shredded/chopped).

5. Use found/used materials in your work. This can be as simple as turning a used medicine bottle into a Bottle of Hope or covering an emptied eggshell with polymer clay. It can also take polymer clay into the realm of mixed media. Before throwing things away, see if there are ways to incorporate them into a work of art. Mechanical parts/gears, broken china, feathers, a few loose beads, random bits of hardware (nails, screws, washers, nuts, bolts)-- the possibilities are endless.

For a little inspiration, see what you can do with something as simple as a burned out light bulb:
Naama Zamir's light bulb ladies
"colorfull's" Crocodiles/Dinosaurs on Etsy -- Check out the rest of the shop for other cute animals-- lovebirds, octopuses (octopi? (g)), monkeys, and turtles.

6. Store cured beads, buttons, and other little bits and pieces in the reusable plastic containers that so many foods are packaged in. Lidded containers (such as the yogurt, butter, etc. containers mentioned before) are especially good, since they can be closed to keep dust out and to prevent a catastrophic mess, should the container topple over. One of the disadvantages of reusing containers rather than buying them is that old food containers are often opaque. It's a pain opening tub after tub in search of a specific set of beads, but you can fix this problem by labeling containers with a little paper tape and a Sharpie.

7. Use "found" tools as often as possible. They're cheap-- very often free. They'll help make your work unique (because not everyone has access to the same exact "stuff" you do). They make it unnecessary for you to buy as much "stuff" as you might otherwise buy-- and every piece you keep out of the garbage can is one less piece that goes into the landfill.

I've written about this subject before, so see these links for some specific suggestions:
Texturing Tools and other "Found" Goodies
Ten on Tuesday: Places to *Find* "Found" Textures
Links to some interesting related blogs entries

8. Bake "en masse". In other words, if possible, don't run your oven all day long, curing one bead at a time. Instead, try to wait until you amass a number of beads-- a whole sheet or baking rack full, ideally-- then run the oven for a single curing cycle. Electricity costs money and uses up resources, so why use more of it than necessary?

9. Bake at cooler times of the day (in summertime). This may be less of an issue for some people, but where I live, our summers can be brutally hot and humid. Air conditioning makes life so much more livable that I'm not willing to go without it (if I have a choice). However, I do try to keep our electricity consumption (and thus our electric bill) down by setting the temperature at a reasonable level and using fans to circulate the air. Running the oven during the hottest time of the day forces the air conditioner to run more often, thus using more electricity. Putting off curing until the evening (or doing it early the next morning) makes more sense.

10. If you sell and ship your work, try to reuse packing materials, if possible. Save bubble wrap, styrofoam peanuts, etc. that you get in the mail and reuse them, rather than buying more. You may even be able to reuse envelopes or small boxes in your packaging. Most buyers are understanding-- even appreciative-- of your efforts to conserve resources, but you may want to mention your packing methods and/or offer the option of nicer packaging for gift items shipped directly to the recipient.

If you have a great idea for claying in Earth-friendly ways, please feel free to share it in the comments section!

Hope everyone's having a great week and a happy spring!

Tuesday, April 15, 2008

Ten on Tuesday: Tax Stress Reduction ;o)

I think tax-related stress has finally pushed me right over the edge. . . ;o)

Ten on Tuesday: Ten Ways to Reduce Tax-Related Stress w/ Polymer Clay

1. Pull out the oldest, hardest clay you can lay hands on. Condition it thoroughly-- knead it, punch it, pound it with a mallet, do one of those "pro wrestling" moves where you jump into the air and land on it! ;o) Just keep at it until you're too exhausted to be stressed.

2. Play with the pretty, pretty colors. (After hours of goggling over tax forms and receipts, your mind may be temporarily reduced to goo. Mixing colors may be the most you can do for a day or two.)

3. Make a sculpture of a generic "tax man" (or the IRS in general). Stand back, admire your work, then squash 'im! ;o)

4. As an alternate to #3: Bake your sacrificial tax man sculpture at about 500 degrees, until he's burnt to a crisp. Of course, burning polymer clay can release toxic fumes which can be almost as irritating as the IRS itself. . . ;o) (Obviously, this is a joke. DON'T really burn polymer clay on purpose. It's just a waste of good clay. (g) And a potential health hazard!)

5. Put on a good movie/CD/book-on-tape/etc., find a comfy seat, and put all that pent-up rage to good use by sanding some polymer clay.

6. Paint (or image transfer) a generic tax man onto a sheet of clay. Slowly feed him through the pasta machine and watch with glee as he S T R E T C H E S . . . ;o)

7. Learn a new polymer clay technique. ("Distractionary" measures.)

8. Make a special "good luck charm / only refunds from here on out" pc-covered pen to use for filling out tax forms in years to come. (I suppose you could even use it this year, if you're fast with the clay and slow with the taxes.)

9. Make your own money (coins or sheets) out of clay to replace what the IRS has taken. ;o) No, it won't be "legal tender", but maybe it'll make you feel richer. . .

10. Sell some of your polymer clay work this year; use part of your earnings to hire a professional tax preparer, next time.

My taxes are done for the year! One hurdle jumped-- on to the next!

Tuesday, April 08, 2008

Ten on Tuesday: "Colorful" Links

This is one of those days when I haven't come to class prepared. ;o) During yesterday's free time, I felt more like making scrapbook pages than typing at the computer, so this morning I have to start from scratch-- not even an idea as a jumping-off point. Let's see if I can make it to ten before I give out. (g)

Ten on Tuesday: Ten "Colorful" Links

1. Lindly Talking Color-- Lindly Haunani's blog about polymer clay and color.

2. Smashing Color-- "Maggie Maggio's blog for the color curious" (including tutorials)

3. Maggie Maggio's Color Scales in Polymer Clay video tutorial. (There are also parts II and III.)

4. Polymer Clay Cyclopedia entry on color recipes and tips.

5. Here's something to look forward to! Lindly Haunani and Maggie Maggio are writing a book on polymer clay and color. It's due out about a year from now.

6. Color-related links collected by "beadyeyedbrat" (aka Tommie Howell). She has links to color recipe charts and more.

7. Here's an earlier post I wrote about places to find color inspiration.

8. Even though translucent clay starts out almost colorless, there's no reason it has to stay that way! ;o) One of my favorite things to do with clay is adding inclusions to translucent (or lightly tinted translucent) clay. (Here are a couple more related links, too.)

9. The Glass Attic page about color offers plenty of information on all aspects of color and polymer clay.

10. Betsy Baker (of Stonehouse Studio) wrote this interesting article for her blog after taking a class with Maggie Maggio. (Funny how a couple of names keep popping up in this list, isn't it? ;o) They're the acknowledged experts on teaching polymer clay in terms of color.)

Well, there they are-- all ten of them. And they even kinda sorta make sense as a group! ;o) (Well, maybe the inclusions link was a bit of a stretch. . .)

Happy Tuesday, everyone!

Monday, March 31, 2008

Ten on Tuesday: Ten Uses for Acrylic Paint

The other day, pulling out the supplies to crackle some paint, I realized that I hadn't devoted a Ten on Tuesday to acrylics. Time to remedy that, because these fast-drying paints have so many uses in a variety of polymer clay techniques! Better yet, you can find them in any arts and crafts store at a wide range of price points. They're so abundant that there's a good chance you have some in your arts and crafts supply arsenal even if you're brand new to polymer clay.

Ten on Tuesday: Ten Ways to Use Acrylic Paint with Polymer Clay


1. Antiquing
To "antique" something-- whether it's made of polymer clay, wood, or another material-- is to give it an appearance of greater age. This is usually accomplished with a little paint.

Antiquing is most effective with a textured piece. Start with a cured and cooled piece of clay. Apply paint straight from the bottle/tube, covering the entire piece. (Use a color that contrasts with the color of the clay. Dark brown and white are common choices, but you can use any color you like.) Before the paint has had a chance to dry, wipe away most of it with a soft rag. (Try to find a clean, lint-free rag. Otherwise, the lint or dust from the rag can make a mess of things.) The idea is to remove the majority of the paint from the piece, leaving it only in the recesses. Grooves, nooks, and crannies should catch the paint, much as small amounts of dirt and oil remain in the hard-to-reach spots on true antiques.

Play around with it until you're happy with the results. You can continue adding and removing paint until you're satisfied. You can remove stubborn paint with a slightly dampened rag or even a light sanding. (I find a little alcohol is helpful, if water's not doing the trick.)

2. Highlighting
Highlighting is essentially the opposite of antiquing. Instead of trying to leave paint only in the nooks and crannies of a textured piece, you're trying to apply it to only the raised, uppermost portions of a design. This is commonly done with mica powders to emphasize a design, but the technique can also be used with acrylic paints.

Highlighting is not difficult. The most challenging aspect of the technique is patience. Experiment to find whether you have better luck using a paintbrush (perhaps a stenciling brush?) or a fingertip to lightly dab paint (in any color or combination of colors) onto clay (raw or cured). Try not to overload the brush/fingertip with paint, as this can lead to paint seeping down into the crevices. Just take it a bit at a time, tap-tap-tapping (and reloading as needed) until you're done. You can highlight as much or as little of the pattern as you like and can apply as few or as many layers (in different colors, maybe?) as you like.

3. Washing/Glazing
It seems that the terms "wash" and "glaze" are often used interchangeably. I tend to think of them as slightly different things. The main difference (in my mind) is that a wash is matte (almost chalky, even), while a glaze is glossy. However you think of them, here are two related uses for acrylics:

A wash is paint that has been thinned down using either water or an acrylic medium. (Using water to thin the paint can cause the wash to bead up on cured polymer clay. This makes it difficult to use, so some advise against adding water to acrylics. Feel free to experiment to find what works best for you.) Adjust the ratio to get your desired consistency. Use a wash to achieve a matte, translucent layer of color. You can apply multiple washes to build up layers of color to achieve just the right opacity. Let each wash dry thoroughly before applying the next.

You can create a glaze with acrylic paint by mixing a few drops into a little Varathane, Future, or a product made specifically for creating acrylic glazes. The resultant mixture will create a translucent layer of color that will dry with a shine. This type of glaze can be used to cover an entire piece or as part of an antiquing process. Multiple layers are always a possibility. Just give plenty of time for drying between coats.

4. General and Detailing
General painting on polymer clay-- that is, using a piece of polymer clay as an canvas or painting every inch of a piece with opaque paint-- is largely overlooked, but it is certainly possible. You can start with raw or cured polymer clay. (I'd suggest curing it prior to painting, in this instance.) Paint just as you would any other surface, allowing ample drying time between coats. If desired, you can pop a cured piece back into the oven to harden the paint.

Detailing refers to painting the small details in a piece, such as the eyes, lips, and cheeks of a face. A tiny brush and a steady hand are your best aids in detail painting. If you make a mistake, you can quickly remove the paint with a damp cloth. Take your time, and don't forget that you can apply multiple layers to achieve darker or richer colors. A few thin layers (with "dry-time" between each) is better than one globby, thick layer.

5. Tinting Solid Clay
Because polymer clay comes in such a variety of colors and can be easily mixed to produce nearly any color imaginable, there's not really a need to tint it with paint. However, there are some of us who like to try things whether they're necessary or not. ;o)

There are mixed reports on how well acrylic paint works for tinting polymer clay. If there's too much paint in the mix, it can lead to plaquing or maybe even bubbling. For faux effects-- particularly imitations of stone-- a little plaquing doesn't hurt. In fact, some people try to induce plaquing! General knowledge is that you shouldn't use too great a ratio of paint to clay, but I say it can't hurt to experiment. I suggest letting the paint dry on the clay before kneading it in. This should make less of a mess. Oh, and for the greatest bang for your buck, try tinting translucent clay. You can mix paint into opaque clay, too, but obviously it won't have as much impact as with translucent.

6. Dry Brushing
This is another of those techniques that work best on a textured piece.

To dry brush a piece, pick up a little paint on a stiff, flat brush, remove most of the paint by brushing the bristles over a paper towel, then lightly brush the piece, leaving just a hint of color on the raised portions of the design. You can go over a piece several times until you get the desired finish. Consider using different colors in separate applications.

7. Brocade, Faux Gold Leaf, and Faux Silkscreening
Donna Kato's most recently published book, The Art of Polymer Clay: Creative Surface Effects, demonstrates some lovely techniques involving acrylic paint-- faux gold leaf, Silkscreen effect, brocade effect, and pattern overprinting.

Even if you don't own the book and can't get your hands on a copy, you can still enjoy this tutorial based on one of her appearances on The Carol Duvall Show: Polymer Clay Painted Pendant (featuring the brocade effect).

8. Faux Stone
Several faux stone recipes call for acrylic paint. Of course many faux stones are finished with an antiquing of dark brown-- to give then that ancient look-- but in addition to that, black, brown and white paint in particular are used in techniques that replicate the layered or banded effect found in so many natural materials. Agate, turquoise, marble, and onyx are a handful of faux stones that use acrylic paint, for instance. (Check out this older blog post for links to some related tutorials.)

9. Mokume Gane
(I love this technique, and I've written about it on more than one occasion.)

Acrylic paint can be used in mokume gane with beautiful results. Metallic or iridescent paints are more commonly used than regular ones, but anything is possible. Paint is most commonly used in mokume gane slabs made of translucent clay, as this allows the paint to be seen to the best advantage-- but again, feel free to experiment. Simply roll and cut your clay to the desired dimensions, paint, and let dry. Stack the painted clay and proceed as usual for mokume gane. You can make your mg with several layers of the same color of paint, a variety of colors, or in combination with other materials (metal leaf, for instance).

10. Crackling (or Crazing)
This is another technique that I've loved since the first time I saw it.

This is a simple technique that yields beautiful veneers of clay that can be used in any number of ways. It's helpful to have a pasta machine, but an acrylic rod will do in a pinch.

Start with a uniform sheet of clay in any color. Black is a common choice, but don't be afraid to try something different. Skinner blends can create striking results, too. (Here's a little tip: Don't make this sheet of clay too thin. You'll be thinning it more later on.)

Paint the sheet of clay with your acrylic paint. Metallic or iridescent paint is generally used for crackling, but regular paint will also work. You can use one color over the whole sheet or combine a number of colors in stripes, dots, or random squiggles. Combining different brands of paint can make an interesting crackled sheet, as each brand crackles in a slightly different way. You can cover as much or as little of the sheet as you like. Allow the paint to dry thoroughly. (Trying to crackle before the paint has dried will only make a mess.)

Adjust the pasta machine to a thinner setting and feed the decorated sheet through. The paint should crackle in one direction. To crackle it in the other direction, too, turn the sheet, adjust the pasta machine down to an even thinner setting, and feed the clay through once more.

You can also create a crackled effect on polymer clay by using special products designed to create crazing in the paint on any object. You'll need a crackling medium (sometimes in one bottle, sometimes two formulas kept separated in a pair of bottles). These products create crackling through a chemical process instead of a physical process (such as the physical stretching of painted clay, as described above).

Things to consider:
  • These techniques work just as well with metallic acrylics as with regular acrylics.
  • Some paints' colors can bleed into the surrounding cured clay, over time. This seems to be a problem particularly with red. Some people report success with sealing the clay before applying paint. Others say that this hasn't helped. It probably varies with the brands of paint and sealant.
  • Brands differ. Even colors within brands can vary, from one to the next, as to which ones crackle best, will/won't bleed into cured clay, etc. Experimentation is often the only way to find what will and won't work. I think I've had different results with the same bottle of paint on different occasions-- probably related to the time of year and humidity.
  • Some suggest that you cure painted clay to harden the paint. Some also suggest sealing. What's necessary will depend on what you're going to do with the finished piece. I've put a clay button with unsealed crackled paint through the washer and dryer a few times with no adverse effects (so far), but who's to say it won't come peeling off eventually? Use your own judgment. :o)
  • There are different opinions as to how different qualities of paint-- craft vs. artist quality-- perform for various tasks. Some prefer one brand, others another. The best solution seems to be to experiment until you find what works best for you.
Here are a couple of useful links:
http://www.angelslanding.com/pushmolds/paint.html
http://www.glassattic.com/polymer/paints.htm

Tuesday, March 25, 2008

Ten on Tuesday: Polymer Clay Buttons

Button, button, who's got the button? ;o)
Remember playing that children's game?

I have a few family members who are interested in polymer clay. They're already involved in quilt-making, and they're particularly focused on using polymer clay to make buttons to use as embellishments on their upcoming quilts.

Until the last week or two, I hadn't really made buttons before (except for a couple to use in jewelry), but I decided to look into the possibilities, since I may host a "clay day", sometime soon. To start myself off, I did a little research on the subject of polymer clay buttons. Here's some of what I found online:

Ten on Tuesday: Ten Links Relating to Polymer Clay Buttons

1. Sarajane Helm's page on polymer clay buttons
She's tested buttons made of Fimo Classic and Premo. Both held up well to washing (with detergent and warm water) and drying. (She even links to photos of the tested buttons, if you want to see the proof for yourself. (g)) One thing I noticed in the photos of the Fimo tests is that the mica powders seemed to have worn off after washing, even thought she finished them with Varathane. . . One other thing to note-- her buttons have acrylic shanks, but if you use a strong brand of clay, you should be able to make buttons with holes, too.

2. Layl McDill's Silly Milly Polymer Clay Buttons
She mentions (as I think I've heard before) that though pc buttons are "washable and durable", they may not be compatible with dry cleaning chemicals, so you should tell your dry cleaner about them beforehand, to be on the safe side. (Other resources simply state that dry cleaning is a no-no. . .)

3. Polymer Clay Button Tutorial from Crafty Daisies
This is a little video tutorial for making simple, chunky buttons. Personally, I probably wouldn't use Fimo Soft. From what I've heard and read, it's not the strongest brand of clay. (Fimo Classic, Premo, or Kato are all supposed to be stronger.) However, they might be fine if they aren't going to be under a lot of stress.

4. CandyFimoWebTR's polymer clay button video tutorial
Another video tutorial using Fimo (not sure if it's Soft or Classic) to make buttons. This tutorial uses cookie cutters to make some of the basic shapes.

5. CraftyGoat's (Angela's) blog post/video tutorial on button-making
Covers not only making button holes or adding a shank using a jump ring (a very common jewelry finding), but also making a mold from an existing button using Amazing Mold Putty.

6. GlassAttic page on buttons
The good old stand-by. ;o) Here are a few tips I found on this page:
  • For added strength, bake buttons longer than the minimum time recommended. (I do this for most stuff, actually, unless I'm really concerned about darkening. Of course, I also tent everything with aluminum foil to prevent darkening. . .) This means baking for at least 30 minutes no matter the thin they are. (I usually bump it up to 45 minutes minimum. As long as you're monitoring the temperature, it shouldn't burn even if you bake it for hours.)
  • To create a raised rim (or an impression in the center, depending on how you look at it), just press something smaller than the diameter of the button into the middle of the button. (As I read in a book recently, this can also help protect the thread, since it will sit lower inside the button and won't be rubbed against as much.)
  • Make your own shank with a "U"-shaped wire.
  • You can use a tiny round cutter (even something as simple as a drinking straw) for cutting holes, if you don't want to "poke" holes with a needle tool. (Poking may cause some distortion in the button. It's mostly a matter of preference.)
  • Holes can also be drilled after baking. (Use a hand drill or even just a small drill bit.)
  • "Some one suggested using two holes, angled inward toward each other (rather than straight up and down) to decrease the stress on the clay between the holes.... mostly important if the buttons will actually be used as buttons (rather than being decorative)" (Would that really make much difference? It might be worth a try if you're planning on using the buttons in a higher-stress application.)
  • Washing and drying (even under high heat) should be ok-- just don't dry clean. (Of course, to be on the safe side, it's best to test one or two before committing to a larger project. Sew the button to a rag or something, then toss it in with your regular washing. After it's been washed and dried a few times, you should be able to see how well it'll hold up.)
  • Buttons may even become a little polished with repeated washing and drying.
  • One person reports that buttons antiqued with acrylic paint hold up to washing.
  • Sarajane Helm notes that metallic and mica powders, even if sealed with Varathane, tend to wash off. But if you make a glaze/stain of paint or Pearl-ex mixed with Varathane, they hold up better. (Must be something to do with the layer of powder preventing a good "connection" between the clay and the sealant.)
  • Alcohol-based inks left unsealed on buttons holds up in the washer and dryer. (But be aware that they'll wipe off with alcohol.)
  • Future as a sealant may not work well if you use strong detergents or bleach. It can come off.
7. Creative Kismet's (Regina Lord's) button bracelet tutorial
This one's not so much for making buttons to use for traditionally button-y purposes ;o) but it's pretty cute!

8. Polymer Clay Button Cover tutorial by Michelle Ross
Step-by-step for adhering polymer clay slices to metal button cover blanks. Could be useful if you wanted to use your buttons on something that had to be dry cleaned.

9. Polymer Clay Button Cover tutorial by Donna Kato
Another style of button covers.

10. Button hole positioner, by Lisa Clarke
The link above takes you to a photo of this handy tool, and you can read about it (and some other tools) on this blog entry. If you're going to be making lots of buttons with a particular shape cutter, this is a great idea for getting the holes in the same place on each and every button.

These links (and a couple of pages in Sue Heaser's new Encyclopedia of Polymer Clay Techniques) helped me learn most of what I needed to know about polymer clay buttons-- plenty enough to get started. It's always such a satisfying feeling when two or more of your interests coincide. Now I'm all geared up to make some polymer clay buttons to use in my next sewing project! :o) (They can also be cute in scrapbooks, altered books, and other arts and crafts that use mixed media.)

Happy button-making! :o)

Wednesday, March 19, 2008

Gorgeous moss-green earrings!

I love these earrings Eliz'art recently posted on her blog. They remind me of the results I got playing around with the faux marble technique in Carol Blackburn's bead book, only these are done up in such wonderful mossy greens! (I am a huge admirer of mossy greens. (g))

Ok, that's all for now. Just had to share the pretty picture. :o)

Etsy Love Stories

I know that a lot of folks (myself included) are selling their polymer clay (and other) creations on Etsy these days. I knew it was a great place to sell or buy unique handmade items, but it never occurred to me that it could also be a way for single folks to meet and fall in love!

Check it out here: Etsy Love Stories.

I really shouldn't have been surprised. My husband and I met online, too-- on an e-mail list dedicated to discussing books by a favorite author. It just goes to show that you never know what's going to happen when you wander around on the World Wide Web. ;o)

Tuesday, March 18, 2008

Latest Issue of Polymer Cafe

Friday afternoon, the latest issue of Polymer Cafe arrived. It doesn't seem long since the last issue came out-- a pleasant surprise in my mailbox, now that the magazine has made the switch from four issues a year to six.

Lots of eye candy in this one-- including plenty of gorgeous photos of Kathleen Dustin's work (like the piece on the cover) and a gallery of work by the authors of projects in this issue. There are a couple of sculpting tutorials and a few jewelry projects, as well as a tribute to Joan and Mike Clipp (the initial publishers of the magazine) and the other regular features. Oh, and quite a few ads. ;o) I actually like seeing some ads-- gives me an idea of what else is out there. I particularly like the ones that have nice photos of potential projects.

So now I have a little more clay-related reading material! ;o)

Ten on Tuesday: Polymer Clay Eggs

It's nearly Easter again, already! When I was growing up, my sisters and I always looked forward our annual Easter egg hunt at home (and then two more with cousins from each side of the family!). Most of the eggs we hunted were made of colorful plastic, but there was always one "prize egg" for each child, holding a little extra gift instead of the usual candy. In early years, the prize eggs were a shiny silver (still plastic)-- later they were tiny egg-shaped tins.

Those eggs came out of storage just once a year, but decorated eggs needn't be restricted to Easter celebrations. You may have heard about (or even seen in museums) the beautiful Fabergé eggs made of precious materials, for instance. While you may not be able to afford an egg covered in gold or rubies, if you're handy with polymer clay, you can create your own decorative eggs.

Practically any technique can be applied to clay-covered eggs, from mokume gane and thinly sliced canes to mosaic and mica shift. It's mostly a matter of inspiration. Here are some photos to give you an idea of what is possible:

Ten on Tuesday: Ten Photos of Polymer Clay Eggs
You can find more eggs in many of these photo streams. :o)
  1. Eggs (set), by polymer_woman
  2. Polymer Clay Covered Eggs (set), byChicki2008
  3. Faux Chocolate Egg, by hambacreations (Amy)
  4. Polymer Clay Egg, by wabi-sabi creations (Pamela Franceschetto)
  5. Birds Nesting Eggs, by divadea (Alissa Plant)
  6. Feathered Egg, by Jael of jaelsjewels
  7. Egg, by Ruth Tarragano
  8. Floral Egg, by polymerclaycreations (Angela Hickey)
  9. Egg Ornament, by made in lowell (Liz)
  10. Sheep Knoll Red House, by Folk Art from the Heart
Ok, I found more than ten, and this time, since it's so easy to add a few more links, I decided to add a bonus of five more Flickr finds. Aren't you EGGstatic? ;o) (Sorry, I can't resist puns.)
  1. Cat Egg, by Muselover (Ann)
  2. littlegod1, by Leslie Levings
  3. GRAMPS, by Gourd Girl
  4. Polymer Clay Egg, by WigglebuttClay
  5. Crimson Fire Egg, by ssneed
Feeling inspired by all those egg-cellent examples? (Again, sorry. (g)) If (like me) you've never made a clay-covered egg before, you may need a few pointers. You can find some helpful information on this page of GlassAttic. Here are a handful of other related links:
Happy claying! :o)

Tuesday, March 11, 2008

Ten on Tuesday: Springtime Palettes

I don't know what the weather's like where you live, but around here, it's starting to feel more and more like spring. When that happens, my thoughts gravitate toward Easter egg pastels and the fresh greens of baby plants.

If your home town is still facing weeks of bitter cold, maybe you need a boost of cheery color even more than I do! And for those of you in the southern hemisphere. . . Well, any time's a good time for a springtime palette. (g)

Ten on Tuesday: Ten (or so) Springtime Palettes

1. springtime chic--
I'm mainly drawn to the apple green and aqua/robin's egg blue combo (I have a real thing for those colors, it seems), but I think the addition of the coral pink and warm brown is nice, too. This combo is cheerful and gives a nod to classic springtime pastels, but it's not "plastic Easter egg"-y, if you know what I mean. (g)
springtime chic

2. Lady Beetle's House--
Here's something a bit brighter. Those greens paired with peach and berry hues look sweet to me. I can almost taste fruit-flavored candy!
Lady Beetle's House

3. Spring's Premiere--
This palette looks like a sunny day to me. I love how simple and fresh it is. It reminds me of clean laundry flapping on the line-- little lambs frolicking on the lawn-- little puffy clouds drifting lazily across a baby blue sky. . . Well, you get the idea. ;o)
Spring's Premiere

4. Spring Forth--
This one starts from a similar place as the last one-- the classic combination of yellow, green, and blue-- but it progresses into darker shades of blue. For me, the darker blues take the palette from the sunny afternoon through the twilight and into moonrise (with a liberal sprinkling of stars and a soundtrack of frog song ;o)). Maybe to someone else they're a reminder that there can still be a chill in the air in early spring. . .
Spring Forth
Now that I look at this again, I'm getting some Starry Night (Van Gogh) vibes. Maybe not quite greenish enough in the blues, though. . .

5. spring1--
More yellow, green, and blue. I must not be the only one who loves these colors together. ;o) These are all pretty warm, I think, which is fitting for spring, I guess.
spring1

6. Spring Salad
These colors do remind me of a salad with lots of lovely, colorful lettuces. Taken on their own, some of these colors (the dark teal and especially the plum) may not seem particularly springlike, but who says you can't have dark colors in a springtime palette? Spring doesn't have to be all pastels (unless you like it that way, of course). A little variety can spice things up.
Spring Salad

7. springforward and spring spirits--
This palette is proof that you should "never say never" about a color. As fashion trends shift-- and as our perceptions shift with it-- we sometimes find ourselves liking colors we once thought we hated. If you had told "Teen Me" that I'd someday like "harvest gold" and tints of mustard, I probably would've laughed at you. ;o) While they still aren't my favorite colors in the world, I have to admit that they have a definite appeal in certain applications. For example, this gentle progression from softest pink to champagne and gold warms me right up.
springforward
For a golden palette that's less delicate, how about this one?
spring spirits

8. spring velvet and spring--
I'm a sucker for combinations of dark red and light green or pink and green. With these rather bronzey greens, the combo isn't at all childish or "1950s ice cream parlor-ish" (not that I don't like that style, too!). Instead, it has a certain maturity. Or maybe I'm just won over by the word "velvet". ;o)
spring velvet
Ok, I can't leave it at just one, so here's another "red and green" combo:
spring
(sighs) Ah, the perfect "complimentariness" of the spring green with the wine reds. . . Anyone else ever read The Blue Castle by L.M. Montgomery? I've always coveted Valancy's dress. . .

9. Spring Meadow and spring--
Here's something a bit more "rainbowy". I'm very fond of the softness of these colors in contrast with the medium periwinkle blue. . .
Spring MEadow
But if you like something a little bit bolder, try this one:
spring

10. vernal woods--
Let's close with something that puts most of the focus on green, the most abundant color of springtime. The ColourLovers site overflows with lovely palettes that demonstrate a very gradual shift in color. These generally appeal to me, but today, I was drawn to this palette with a little more variety.
vernal woods

Also on the subject of springtime color--
If you'd like to see what you're supposed to like this season ;o) have a peek at a couple of color forecasts for spring-summer 2008: Fire Mountain Gems and Pantone Fashion Color Report.

Monday, March 03, 2008

Ten on Tuesday: Ten Ways to Sign Your Work

We're probably going to have some bad weather in this area early tomorrow morning, so just to be on the safe side, I'm posting this a bit early. I hope your week's off to a great start! :o)

~ ~ ~ ~ ~

After pouring your heart and soul into a piece of work, wouldn't you like to "leave your mark" on it? Paintings are usually signed-- literature is printed with the author's name prominently displayed-- why not include your own signature, initials, or other personal mark on your polymer clay creations?

Obviously, this can be a bit tricky if you make small objects like beads-- and personally I never sign that type of thing-- but it can certainly be done. If you make larger-scale items, it's easy to find a spot to "sign" in one way or another. It's just a matter of deciding how to do it. . .

Ten on Tuesday: Ten Ways to Sign Your Work--

1. Sign with a pen.
Perhaps the most straightforward way to sign your work is to write your name directly on the object (usually on the bottom of the piece or another hidden, inconspicuous spot). What is less straightforward is what ink works best. Some pens (such as Sharpies) can bleed into the clay over time. This page at Glass Attic contains information on a variety of different pens and how they work with polymer clay.

Before you use a new pen to sign your name on a creation that took twenty hours of your life to make, I'd suggest running a series of tests on small scraps of clay. Be aware that it can take months to determine for certain how an ink will behave on the clay.

2. Sign with paint.
If you have a steadier hand with a paintbrush than I do ;o) , you may want to sign your work with paint. Just as with pens, there's the possibility of the paint bleeding into the clay-- particularly with red paint. Experiment on scrap clay to be on the safe side. It can take a while for the bleeding to become obvious, so date your tests and come back to them every so often.

One extra precaution you can take is to seal your cured piece prior to signing. Seal again (with Future, Varathane, etc.) to protect your signature.

There's more about paints and clay on this page of Glass Attic.

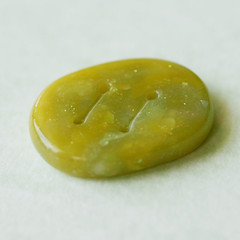
3. Carve it.
One simple way of signing your work is to carve your name or mark directly into the clay. If you do this prior to curing, you can use almost anything from a needle tool to a ball-ended stylus to do the "carving". The disadvantage to doing this pre-curing is that it's easy to distort the clay or mar your work. Carving your name after curing, on the other hand, will require that you use some sharp instrument. You may be able to use a craft knife, but if you have linoleum cutters (such as the set from Speedball), they're better for carving cured clay. (Be careful when you use any sharp tool. Practice using the linoleum cutters on cured scrap clay before trying them on anything special. Go slowly-- move the piece you're carving instead of the cutter-- and keep the cutter pointed away from you and your hands.)

Once you've carved your piece (and cured it, if you carved it raw), you can make your signature more visible by either antiquing it with acrylic paint or backfilling with a contrasting color of clay. (If you use clay, remember to cure the piece a second time!)

4. Transfer it.
I don't know that I've ever seen or heard of anyone doing this before, but I don't see any reason why it couldn't work. There are numerous methods of transferring images. Some require special papers and/or ink jet printers. For others, you need nothing more than a toner copy (think Xerox machine copy), clay (preferably in a light color), and water. Using your preferred image transfer method, you could sign your work with your name in any font you like, with a copy of your own actual signature, or with any "mark" or symbol you like. Just keep in mind whether or not your chosen method of image transfer will reverse the image. If it will, remember to mirror the image before printing it.

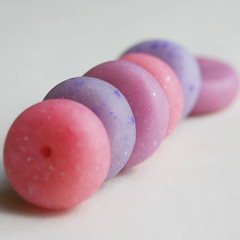
5. Make a signature cane.
I haven't heard much about this, lately, but some artists make a cane with their initials, logo, or other signature mark, then incorporate thin slices of it into their work. For larger pieces, you could work a slice of the cane into the design or embed it into the bottom of the object. Making a cane of this type may be a bit daunting for someone new to millefiori, but it's something to consider. This video starring Marie Segal includes information on making a signature cane.
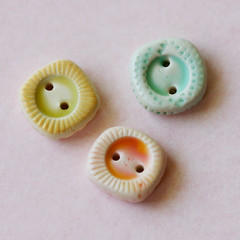
6. Have a custom stamp made.
If you have the cash to spare, you can have your own designs made into a sheet of rubber stamps. You can easily fit a number of small "signature stamps" into one of these, with room to spare. Sarajane Helm has written about her experience having custom stamps made by Ready-Stamps. Use your custom-made signature stamp to leave an impression of your name or mark-- usually in an inconspicuous spot, such as the bottom. To make the signature more visible, you can antique it, backfill it, or highlight it with mica powder, acrylic paint, or rub-on wax.

7. Use a ready-made stamp.
Ok, maybe it's not ideal, but if you're short on funds, but already have an alphabet of rubber stamps, you can use those to sign your work. With larger stamps, you may have room only to leave your initials, but some stamps are small enough that you can fit in your full name. Don't forget the alphabet stamps you can find beyond the confines of the rubber stamp aisle of the craft store! The tiny stamp sets used in address stamps are great for polymer clay. You can also use metal stamps meant for marking serial numbers, etc., in metal surfaces.

If you're planning to sell what you make using rubber stamps, it's a good idea to check out the company's "Angel company policy". This will tell you whether or not it's legal to use the stamped image in artwork you intend to sell. There are variations in policy from company to company. Personally, I feel this should be much less of an issue if the stamp is used on the back or bottom of a piece purely to "sign" the work-- but use your own discretion.
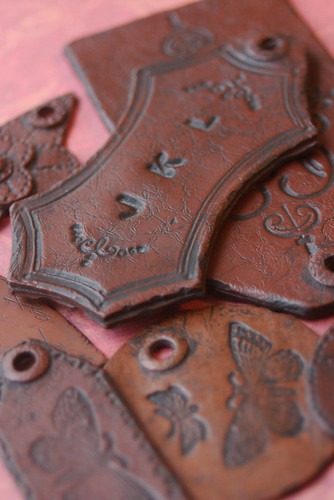
8. Make a "2-step stamp".
You can make your own custom stamps out of polymer clay-- not only of your signature or "mark", but of anything you like! To make a "2-step stamp", start by carving your design. You can use raw clay or cured clay. Just be sure it's thick enough that you can carve your design without going through the bottom. Try to maintain a consistent depth throughout the design. If you need a guide to follow, you could either transfer an image of the design onto the clay or draw it by hand before carving. (If you carved raw clay, cure it before proceeding.)

Step two is to take a cast from your freshly carved mold. (Wait until it has cooled, if you just cured it.) Use a release agent and press raw clay into the cured mold (the thing you carved). This will create a "raised" version of your design, which you can cure and use as a stamp. If you notice that you didn't manage to keep the depth consistent in your carving, parts of your new stamp may be taller than others. You may be able to even things out a little by sanding it against a flat surface.

If you're very good with the carving tools, you may be able to condense this process by simply carving the raised design directly out of the first block of clay. This can be a bit messy, though, if your design is very detailed.

9. Make a "credit card stamp".
This is an idea I found in Donna Kato's latest book. She describes Jacqueline Lee's signature stamp this way: "To sign her artwork, Jacqueline Lee makes a mold from her name on a credit card and then presses raw clay into the mold. She then presses the clay to the piece." I haven't tried it yet, myself, but if your work is of a size to accept that type of signature, it seems like a pretty nifty idea!

10. Make an "extruded snake stamp".
Visit Polymer Clay Central to see Kathy Canuel's tutorial for a custom-made polymer clay stamp using an extruded snake of clay to make a quick and easy stamp. You'll need an extruder, some liquid clay, and regular polymer clay. The tutorial demonstrates making a word stamp ("Hope"), but you can use the same technique for any word, name or symbol you choose. In Kathy's examples at the end of the tutorial, you can see her personal "mark" for signing her work.

As you can see, there are methods to suit every style, budget, and application. I hope you've found one that you'd like to try. :o)

~ ~ ~ ~ ~

P.S. You know what they say about great minds thinking alike? ;o) Well, the day after writing this (I sometimes do these in advance, when I'm in a bloggy mood, so that I don't have to scramble on Tuesday morning), I saw that I wasn't the only one inspired by Kathy Canuel's tutorial. Angela (Crafty Goat) has also written about ways to make your own stamp-- including a variation on Kathy's technique. Some of our ideas were the same, but there are other techniques on her list that aren't on mine, so if you haven't already seen that blog post, you might want to head over there and have a look. :o)

Actually, there could be several blogs with posts similar to this, and I probably wouldn't know about it, at the rate I read blogs these days. . . (g) So if it ever looks like I'm copying your blog, please know that it isn't intentional. At the very least, I try to mention and link to the blogs I copy. ;o)

~ ~ ~ ~ ~

P.P.S. My temporary loss of internet access was only part of my recent computer-related woes. We also lost all our saved e-mail. I know that I had received at least one e-mail in response to my earlier post, "Any suggestions?". Unfortunately, I hadn't even had a chance to read it, so if that person sees this and is able to resend the e-mail, I'd appreciate it. I'm sorry for the inconvenience. At least everything is up and running again, now. :o)