Showing posts with label tutorials. Show all posts

Friday, August 28, 2009

Songbird Eggs Tutorial

I've been a bad blogger. I'll continue to try to do better, but we'll just have to see how that works. (g)

If I'm one of your contacts on Flickr, you may already have seen this, but for those who haven't, there's a new tutorial up on Polymer Clay Web.

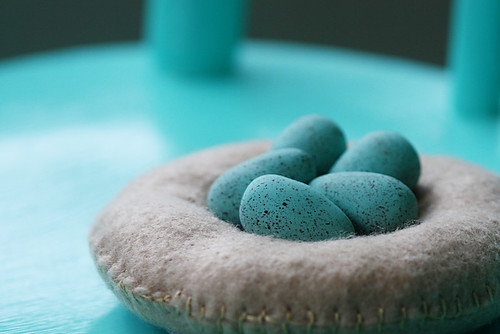
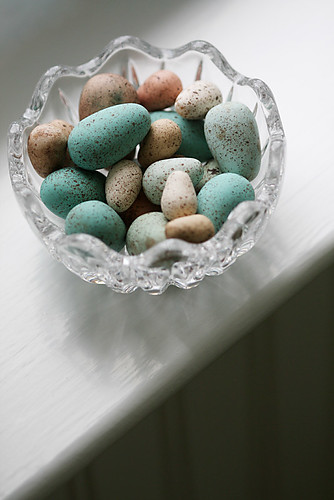
Faux Songbird Eggs

~Songbird Eggs~

For symbols of springtime, life, and new beginnings, few things can compete with the songbird's egg. Softly tinted eggs are a refreshing reminder of unending potentialities in the world around us.

People often puncture, drain, clean, and dye chicken's eggs with beautiful results, but real eggs are delicate. These polymer clay eggs are much more durable, and you can make them in any size or color you want.

With only a few supplies, you can create a whole nest's worth of polymer clay eggs. They make charming decorations for the home, or they can be fitted with an eye pin and worked into unique pieces of jewelry.

This is a simple project ideal for children and those new to clay.

Faux Songbird Eggs

Faux Songbird Eggs


Friday, July 24, 2009

"Chatty Charms" Tutorial

("Chatty Charms?" you say. "Really?" Yes, really. I have a penchant for cutesy names. I'd like to say I've struggled with it, but that wouldn't be true. I've merely given in to it-- alliterated myself into oblivion. Oh well. We all have our faults.)

Today, I added a tutorial for "Chatty Charms" to Polymer Clay Web.

You may, perhaps, be wondering what on earth a "chatty charm" is.
Here's an explanation:

Do you have something to say to the world? Feel the need to express yourself? "Chatty Charms" can help you spread the word, leaving your mouth free for other, more engrossing pursuits, such as eating ice cream, smooching, or playing the harmonica. (These are of course only suggestions. If you'd rather whistle, stick out your tongue, or savor some chocolate instead, I won't tell.)

Ideal for beginners, this project relies upon a couple of very basic but versatile techniques. Stamping and antiquing are useful in a variety of other applications, and this is a fun way to familiarize yourself with them both.

Put your monogram on a pendant— create handy label-style keychains— engrave favorite quotations on fridge magnets! Choose words of inspiration, pile on the sarcasm, or opt for something completely off the wall! It's such a simple yet rewarding technique, you'll find it hard to stop.


So as you can see, this probably won't be anything new to people who've been claying a while. It's more geared toward those who are still new to polymer clay. That said, I did try out a couple of new (to me) things, in the process of making the tutorial.

First, I sanded some of the antiqued pendants. In the past, I've always just wiped the paint away before it dried completely. I think both techniques have their merits, but I've gotta say, right now I'm really loving the sanding. Wiping away the paint with a paper towel frequently leads to a vicious circle of wiping too much-- having to reapply the paint-- wiping too much again-- and so on. Since you wait for the paint to dry completely before you sand it, it seems a little easier to remove just as much as you want. (On the other hand, with sand paper you run the risk of scratching/removing some of the texture of the piece.)

Second, I tried using a thin coat of translucent liquid clay over an antiqued pendant to serve as a protection and to increase the sheen. I was very happy with the results-- much nicer (in my opinion) than a regular acrylic finish. I prefer the way the liquid clay feels, and there's no mess with brushes or streaky brush marks. Of course, we'll have to see how well it holds up, but I don't foresee any problems.

Well, that's it for me for today!
Happy claying!

Thursday, January 29, 2009

Valentine's Day? Already?!

Ok, it's not quite February 14th, but it'll be here in the blink of an eye. If you're planning to craft a polymer clay token of your affection for someone special, it's time to make your plans. Here are a few links that might help get you on your way to Valentine crafting bliss:

Sunday, December 21, 2008

Tutorial: Gingerbread Cookies

As usual, I'm running late, but there's a new holiday-themed tutorial available on Polymer Clay Web. It's our version of gingerbread:


Ever since I made "gingerbread cookie" ornaments and pins for some family members, last Christmas, I've been meaning to fix up a tutorial for this holiday season. Well, I guess that I did. Technically. (g) At least it's there for next year, right? And who says you can only make gingerbread in December? Seriously, these go together pretty fast, and I bet they'd be lots of fun to make with the kids or grandkids.


Now, back to the clay room. I have some gifts to finish by Wednesday! (Can she do it? Will she have to stay up until the wee hours to accomplish her gift-giving goals? Stay tuned to find out! ;o)) I hope you're all enjoying the holidays and not stressing out too much!

Monday, July 07, 2008

Handmade Texture Tools

As I wrote yesterday, playing around with texture wheels got me in the mood to finally turn some odds and ends I'd collected into real texture tools with polymer clay handles.

Here are the results:


Though you can't really tell in this photo, most of them are double-ended. I have to admit that I have yet to try them out in their finished form. I was just too eager to post about them. (g) (See? I really am getting back into this blogging thing.)

I know people have been turning bits and pieces into texture tools for years. There's nothing cutting edge about it. Still, I have a feeling that there are many others like me who've heard or read about it, thought about it, maybe even gathered promising random bits of metal-- but never actually done it. For anyone interested in what I learned along the way, I've put up a brief tutorial on Polymer Clay Web: Handmade Texture Tools.

Some people enjoy making their tools pretty, and when I made polymer clay handles for my linoleum cutters, I did put a little effort into making them attractive. However, this time I enjoyed not having to worry about that for an afternoon. It's a little vacation from thinking about fingerprints, color combos, and aesthetics in general. Functionality was the only thing on my mind when I made these. Ah, so freeing to use the ugliest "mud" imaginable and not care that it was hideous! ;o)

Friday, May 30, 2008

Hand-Carving Stamps

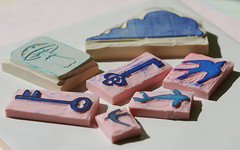
Strictly speaking, this post isn't about clay, but it involves something you can definitely use with clay-- hand-carved stamps!

Most recent stamps

I once thought carving stamps would be difficult, but it's actually very do-able. (Not to say that I'm now an expert, but I've been able to carve stamps that I'm happy to use.) It's also quite a bit of fun!

Here are a few quick pointers:
  • Invest in the right tools. (This is especially true if you think you'll want to be carving on a regular basis.) As with so many other things, having the correct tools makes stamp-carving much more enjoyable. Some people can carve detailed stamps with nothing more than a craft knife, but most of us have better control with linoleum cutters. (You can also use them to carve cured polymer clay!)
    • Remember: 1) It is recommended that you carve with the sharp end pointed away from you. 2) Go slowly. It's easy to go back and remove more later, but if you carve too much, the damage is done. 3) Most people prefer moving the material that's being carved rather than moving the carving tool. Hold the tool more or less "still" and maneuver the carving block underneath it.
  • Keep the sharp tools away from kids and pets. This probably isn't the best craft for kids. Unless they're old enough to chop vegetables and peel fruit, they probably shouldn't be trusted with linoleum cutters. However, you could always let the kids draw the design, then have an adult carve it for them.
  • Find a quality carving material. There are a variety of products out there made especially for carving-- as well as erasers, which can also be carved-- but they're not all created equal. I've only tried a couple, so far. Speedy-Cut (which is a pale cream/beige) carves very easily, but it is crumbly, which means that your finished stamps will also be prone to crumbling. After you put all that time into making a stamp, you probably want it to last, so it's worth paying a little more for something better. I've just started working with Speedy-Stamp ("the pink stuff"), which has a better reputation than Speedy-Cut. So far, it does seem better. Maybe a tiny bit firmer, but still pretty soft-- and much less crumbly.
  • Set reasonable expectations. As a beginner, it's best if you don't start out with a huge, complicated pattern. Instead, let a simple shape be your first project, then go from there. If you like a slightly "rough-hewn", rustic, even "primitive" style, you'll probably love this craft immediately. If you want detailed stamps with smooth, thin lines, you'll need more patience (and practice).
It's a fairly simple process, carving a stamp. It requires more patience than anything else. I'm sure there are plenty of great resources out there, online. Here are just a handful of tutorials to help you get started:
Good luck, and have fun! :o)

Tuesday, February 12, 2008

Ten on Tuesday: Valentine Projects

There are only a couple more days until Valentine's Day-- but there's still time to whip up a little surprise for someone you love. Here are ten Valentine-themed tutorials/projects available for free online:

Ten on Tuesday: Ten Valentine Projects / Tutorials

1. Candice Mathewson's Valentine's Day Heart Cane. A pretty, lacy heart cane in red, pink, white, and black-- but of course you can make it in any colors you like.

2. If you aren't up to the challenge of the previous cane, Arlene Thayer's Simple Valentine Cane uses a heart-shaped cutter to achieve quick results.

3. Julia Sober's Valentine Hearts. Uses a lettering template to make larger-than-lifesize copies of the famous "conversation heart" candies. (I never did like the taste of those candies, personally, but I guess they're a useful tool for a shy Valentine-hunter. (g))

4. Carol Duvall's Polymer Clay Pins. Doesn't have to be "just" for Valentine's Day, but if you happen to have some Valentine-themed stamps (hearts, flowers, etc.), this is a quick and easy project. (Note that you'll also need Rub 'n Buff, acrylic paint, or mica powder-- anything to highlight the design of the stamps.)

5. Elissa Powell's E-Z Hearts. Again, not "just" for Valentine's Day, but since hearts are so popular this time of year. . . ;o) Here's one easy way to make a heart shape.

6. Christy Sherman's Glazed Heart Pendant. Another "not just for Valentine's Day" project. Shows another way to make a heart shape that isn't a flat cookie cutter shape.

7. Carly Seibel's Valentine Heart Beads. Textures, a shape cutter, mica powder, and teensy marbles-- all in one bead!

8. Sarajane Helm's Polymer Clay Hearts Project. Similar to the beads above, but a bit easier (mainly because they're decorated on one side only and don't involve the tiny marbles). The hearts can be turned into pins, earrings, decorations for cards, etc.

9. Jeanne Rhea's Polymer Clay Valentine Card Project for Young Children. As the title suggests, this project is great for little kids. Combines clay with paper crafts to create an adorable card that's sure to be treasured for years to come.

10. Karen Prince's I Love You Photo Holder. Also uses the shape of a hand, this time shaped into the sign for "I love you". Though this tutorial uses a hand-shaped cookie cutter, you could easily make a paper template by tracing someone's hand. (There are a few more Valentine-themed projects on the Sculpey site, too.)

I hope you all have a happy Valentine's Day this Thursday! And if there's no-one else around this year to be sweet to you, don't hesitate to treat yourself to a little token of self-appreciation. :o)

Tuesday, February 05, 2008

Ten on Tuesday: Ten Mask-Related Links

Apart from being "Super Tuesday", today is also Mardi Gras (aka "Shrove Tuesday" or "Fat Tuesday"). It's the last big hurrah before Lent, and here along the Gulf Coast, there will be plenty of celebrating going on today. There will be jazz music in the air (along with moonpies, beads, and other trinkets), purple, green, and gold everywhere, extravagant costumes, and parades meandering their way over city streets. There will also be lots of masks.

In honor of Mardi Gras, then, I bring you ten links relating to polymer clay masks. Maybe they'll inspire you to try making a mask of your own, whether to wear or to decorate your home-- or both!

Ten on Tuesday: Ten Mask-Related Links

1. Saltandpaper/Natalie's Octopus Mask is a fine example of how some creative thinking can lead to an unexpected mask. Hallowed-Mask, by Michelle of Gabriel Studios, is another opera mask with a very unique form.

2. Polymer Clay Tribal Mask Pendant, by Debra of DSDesigns. Photo of a mask-shaped pendant that has a great metallic finish. She has many more photos of mask-themed pieces, so be sure to browse!

3. For a change of pace, visit TheoJunior's Flickr photostream, where you'll find unusual (and often disturbing (g)) faces/masks, such as Maori Mask.

4. Check out the mask gallery on Linda Weeks' website. (There's even one with a Mardi Gras theme!)

5. Michelle Davis Petelinz's masks, such as Matuko, are designed to be wall art. Some of them have a coordinating shadowbox; others in her photostream are attached to panels for display.

6. DIY hosts Anne Igou's tutorial for a Polymer Clay Mask, originally shown on Craft Lab.

7. Anne Igou's Leaf Mask tutorial was originally aired on the Carol Duvall Show.

8. Here's yet another tutorial by Anne Igou, this time for a Polymer Clay Mask Barrette, originally on DIY's Jewelry Making.

9. If you liked her mask tutorials (above), then check out the gallery of maskwork on Anne Igou's personal website.

10. Sarajane Helm's website offers some pages devoted to polymer clay masks-- both full size and miniature. (Please note that there are links to more mask-related pages, at the bottom of that first page.) In case you haven't heard, Sarajane has a book coming out this summer-- The Art of Polymer Clay Masks.

If you're still hungry for more photos of masks, search Flickr for "polymer mask". You'll find all the photos and artists I simply couldn't fit into my little list of ten. :o)

Happy Tuesday, everyone, and laissez les bons temps rouler! ;o)

Tuesday, December 18, 2007

"Tattletale Santas" -- polymer clay project

Well, it turns out I am blogging again before Christmas-- and just a few minutes after my last post. ;o)

I completely forgot to mention that my husband has put a new tutorial (or "project", if you prefer) on Polymer Clay Web. I still need to proof it (and give him credit), but it's up in time for Christmas (for those of you who don't already have a hundred projects in the works).


"Tattletale Santas" are something my husband (who grew up in Sweden) remembers from his childhood. Little elf-/gnome-like figures were placed around the house to keep an eye on the children of the home. They'd report to Santa (or the Swedish equivalent) on the behavior they witnessed-- hence the "tattletale" part. Wherever they sit and "watch", they're a little incentive to the kids to mind their Ps and Qs in those crucial last weeks before the Big Day. ;o)

Of course, these cute little Santa figurines can be used in any other way you like-- peeking out of holiday floral arrangements, on wreaths, in a miniature "Christmas village" (if you scale him down a bit more), and so on.

So, whether you're looking for a fun holiday project for this year-- or getting a head start for next December-- you can find Donald's Tattletale Santa tutorial here. :o)

Saturday, December 08, 2007

Busy busy

Lately, it seems I just poke my head around the corner on Tuesdays, then disappear for the rest of the week! I've been working on some clay-related things, but I can't show any photos, yet, because they're all gifts. (I doubt that some of the recipients-- my father-in-law, for instance-- look at this blog, but it's best to be on the safe side.)

I suppose I ought to try restocking my Etsy shop, considering that this is probably the busiest shopping season of the year, but I think I may be too late, anyway, and at this point, I have my hands full working on the handmade gifts on my list. We'll see. . .

My husband and I each have an idea for a holiday-themed tutorial/project for Polymer Clay Web, but honestly, I'm not sure if we'll get around to them in time. There's just so much else to do!

In the meantime, there are a few Christmasy links I'd like to share. :o)

One of my Christmas projects that I probably won't get around to this year is to make some "candy" from polymer clay to use on picks in a floral arrangement I'd like to make for my table. One type of candy I'm planning to try is ribbon candy. It has such a fun shape-- and great colors-- and it seems like it'd be very easy, too. PCC hosts one ribbon candy tutorial written by Arlene Schiek. There are a variety of candies (including ribbon candy) in this HGTV-hosted tutorial by Maureen Carlson. Elsewhere on HGTV's site, you can view a short video clip of Maureen demonstrating how to make the ribbon candy. To find it, go to HGTV's "Video Guide", type "polymer" into the search box, and browse the list that pops up.

While looking for ribbon candy tutorials, I came across a couple of cute gingerbread house projects. The tutorial at Polymer Clay Express is for two-dimensional (flat) gingerbread houses-- perfect for ornaments or magnets. A tutorial for a three-dimensional gingerbread house-- great for a tabletop decoration that will last year after year-- is available at Sculpey.com.

One last link-- something that I found this morning while reading a few blogs: Elaine Robitaille's latest blog entry describes her process for making poinsettia ornaments with raised detail. There are photos to illustrate the steps, too. :o)

Well, off to get started on something else!
Have a great weekend, everyone! :o)

Tuesday, November 27, 2007

Ten on Tuesday: Ten Faux Effects in Polymer Clay

Polymer clay is an excellent mimic-- and it's lots of fun to make something so realistic than people think it's the real thing-- so it's no surprise that faux effects are a popular group of polymer clay techniques. Here are ten different faux effects you can achieve with polymer clay. Wherever possible, I've included links to multiple lessons or tutorials.

Ten on Tuesday: Ten Faux Effects in Polymer Clay

1. Opal
This one's a classic, as far as I'm concerned. (It was one of the techniques, if not the technique, that made me interested in trying out polymer clay in the first place.) Different "recipes" call for slightly different products, but most of them start with lightly tinted translucent clay and glitter. There are several different faux opal tutorials available online: my version, Linda Geer's "opalgeers", Barbara Reider's version, Kathy Weinberg's version, Susan Fadl's faux Australian opals, and Donna Kato's version. There are others, too, but this will get you started.

2. Jade
Another classic. You'll need translucent clay (again-- as you will for most faux stones) and something to tint it (usually green), whether you use clay, alcohol ink, powdered pigments, mica powder, embossing powder, or something else. Here are a few ways to make faux jade: Parole de Pâte version (in French), Lynn Krucke's version, Adria Filion's glow-in-the-dark jade, and Vyxxan's version.

3. Lava Rock
This is something I made a tutorial for fairly recently. It's a simple technique that doesn't require much more than black clay and a few texturing tools. Here's my version: Faux Lava Rock. And here's Ponsawan's version, which uses rock salt and earthy colors of clay: Faux Lava Rock Beads.

4. Turquoise
Yet another popular faux stone. Most tutorials require turquoise clay. Many also call for translucent, black, and/or white clay-- sometimes other blues, greens, or yellows. Acrylic paint is another common "ingredient", and sometimes even mica powders make an appearance. Try these tutorials for starters: Jeanne A. E. DeVoto's version, Kathy Halverson's verison, Mary Lyon's version (with a faux coral tutorial further down the page), The Clay Store's version, and the eHow version.

5. Sparkling Moss Agate
Not all faux stones have to stick strictly to the parameters set up by nature. Don't be afraid to put your own spin on a faux technique. Don't have the "right" color of something? Why not experiment with the colors you do have? Desiree McCrorey's sparkling moss agate tutorial turns translucent clay, black clay, and "sparkling copper" Pearl Ex into beautiful faux stones.

6. Agate
Sliced agate comes in a gorgeous range of colors. It's used not only in jewelry, but also in home decor. Read Jenny Cox's faux agate tutorial to learn how to make your own. There are other versions of agate slices in at least two books. (See more on that below.)

7. Fossilized Agatized Coral
I hadn't heard of this stone until I saw Tinidril's tutorial. It's quite pretty, and if you weren't concerned with absolute accuracy, I imagine you could create great effects using different colors, too.

8. Amber
Because polymer clay doesn't cure to complete clarity, it's not as good as resin at mimicking the type of amber that's so clear you can see bugs trapped in it. However, the more opaque amber has its own beauty. Recipes vary, but usually they start with translucent clay tinted in various shades of yellow and honey. Tutorials often call for ink or acrylic paint to give the "stones" an aged appearance. Here are a couple of sites to visit for more information: Faux Amber at Polymer Clay Express and Faux Bone and Ivory by Michelle Ross.

9. Bone/Ivory
Although bone and ivory aren't the same thing, they are often grouped together in tutorials, because they look much alike. Most faux bone and ivory "recipes" require translucent, white, and ecru or beige clay and use a layering or caning technique to imitate the striations in natural bone or ivory. Antiquing with acrylic paint gives the illusion of age. Visit these tutorials for more specific advice: Desiree McCrorey's faux bone/ivory, another tutorial by Desiree, Emi Fukushima's version, and Kim Cavender's version.

10. Abalone
The beautiful colors of this seashell makes it a popular candidate for "fauxing". Here are a few ways to imitate abalone: Polymer Clay Express version, Jenny Cox's version, and Marie Segal's version (three pages long, so don't forget to hit the "next page" button!).

~ * ~ * ~ * ~

There are many more faux techniques out there-- in other tutorials, in videos, in books-- and goodness knows how many more still waiting to be created! Several books include lessons on a few faux effects, but as far as I know, there are only two that are solely dedicated to the subject: Irene Semanchuk Dean's Faux Surfaces in Polymer Clay, and Victoria Hughes' Polymer: The Chameleon Clay. For the bead-maker with a penchant for faux, I can also recommend Carol Blackburn's Making Polymer Clay Beads. The second section of the book focuses on faux techniques-- sixteen of them.

Here are a few related websites you might also want to check out:

Tuesday, October 09, 2007

Ten on Tuesday: ten October projects/inspirations

It doesn't feel very Octoberish around here, yet. Highs near 90, still! But we're expecting a slight cool spell by the end of the week-- and maybe some of you other folks are already enjoying crisper air.

Whether eerie, shivery, spine-tingly Halloween is your favorite holiday (and you've had your costume all picked out since June) or you prefer a "cannier" (see "canny", def. #3) celebration of the harvest, it's a great time to pull out the ol' polymer clay and get craftin'. The colors of the season are beautiful, and there's a strange sense of excitement in the air. Take advantage of these fleeting, golden days of October! (Before you know it, it'll be time to think of Thanksgiving and Christmas, and you won't have time to breathe, much less enjoy a leisurely afternoon with the clay!)

Ten on Tuesday: Ten October Projects and/or Inspirations

1. If you haven't already visited Sculpey's list of projects, now's a great time to do so! Many of them are great for beginners or kids, and there's a whole section with fall, Halloween or Thanksgiving themes.

2. Speaking of kids. . . Unless they've changed a lot since I was one (which admittedly, was a number of years ago-- and that number just keeps growing (g)), kids love things that glow in the dark. Consider adding a little glow to a project for a bit of instant spookiness. I just came across this page (by Lesley Shepherd) describing the qualities of glow clay. Could be useful, if you're new to the stuff.

3. If you didn't find the right project on the Sculpey site, check out this page of Diane Black's GlassAttic for a list of links to seasonal or holiday-themed projects. (There's a separate page for Christmas, if you're getting an early start this year.)

4. And for those who aren't so much into the whole "Halloween" thing, here's a little autumnal inspiration. . . This is something I just found by clicking a link at random (from the GlassAttic list): a photo of some beautiful miniature pumpkins. (The photo is labeled "Jodie Pumpkins", so I assume that I ought to give credit to Jodie Last-Name-Unknown.)

5. I learned a while ago that owls were "in" a year or two ago. (I didn't know that when I chose my Internet identity. Honestly! (g) I explain the origin of the name in my profile, if you're interested.) Anyway, if you don't mind looking a bit faddish (or like you're trying to be faddish, but are a bit behind the times (g))-- if your fondness for owls is genuine, maybe you'll benefit from Marie Hart's pictorial guide to sculpting polymer clay owls. As for why this is on the list-- owls are vaguely spooky, aren't they?

6. This one could count as inspiration if you're the type who finds motivation in an organized challenge. You're invited to enter the Inscrutables, MAKE, and PopSci DIY Halloween 2007 Contest. There are four categories, the one most relevant to pc probably being "Decorations, Gadgets, and More". You have until November 4th to enter. Check out this page for more info!

7. There are several pumpkin tutorials out there. Okay, more than a mere "several". I'm too lazy to go through them all, but for the most part, they're very similar. Here's one: Pumpkin Picture Holder, by Jill King. She makes her pumpkins pretty big-- about one pumpkin per 2 oz. package of clay. They have to be large, to support the wire and photo. Personally, I'd probably build the clay around a base of some sort (such as a small stone)-- partly to save clay, partly because I worry that thick items like that might be difficult to fully cure. (Of course, you could also cure it in stages/layers.) Anyway, putting aside my worrywartiness ;o) , you can use a similar technique on a smaller scale to produce miniature pumpkin decorations, beads, or pendants.

8. Need inspiration? If you have time to kill, go to flickr (or your photo-hosting source of choice) or Etsy and search for "Halloween polymer", "creepy polymer", "autumn polymer"-- you get the idea. You never know what you'll find, or what ideas of your own will be sparked.

9. For still more inspiration, visit the PCC Challenge archives. Some of the past challenges have had autumnal themes, such as Harvest and Autumn, or (possibly) spooky themes, like Gothic. Scroll further up the page for a list of photos of Claypen photos (such as Autumn).

10. If you can learn by photos alone (or if you can read Russian... or whatever language this is-- the Cyrillic alphabet throws me for a loop!), take a look at this scull and crossbones cane by cloud777. Thanks to the numerous photos, the process seems pretty clear-- and the results would be great for Halloween-themed projects.

Tuesday, September 25, 2007

Connections. . .

I've been trying out the "extruded snake wrapped around base bead" thing (as I wrote about recently) and am planning to play around with it some more, soon.

That's connected to:

This entry on Le Blog de Perlchen that illustrates how to use scrap clay, a clay gun, and a pasta machine to make an interesting effect.

. . . and . . .

This entry on Parole de Patê, which combines the extruded-clay-wrapped beads with a faux ceramic effect, very prettily. (There's also a link at the bottom to my faux ceramic tutorial and a similar one that was featured on the Polyzine back in 2004. Just goes to show, even if you think you're writing something "new", chances are pretty good that it's been done before. (g))

. . . which is connected to . . .

Something I saw on the Polymer Clay Central message board, back a couple of weeks ago when I stopped by. Someone (I forget who it was... Ok, looked it up. On the forums, she goes by carlierae26, so I assume her name is Carlie Rae, or something similar...) had shared photos of some recent work. It was yet another variation of faux ceramics. She'd used a base of black clay, with opaque glaze, with some nice results. She wrote that she started with opaque liquid clay, but if you have translucent clay, you can always tint it with something opaque. I know oil paint will work, and I think that powdered pigments (mica or just ground up pastels) also yield opaque color.

I'm definitely going to have to give all of these a try! (Maybe I'll remember them, now that they've been blogged...)

On another subject-- Here's a link to a new-to-me polymer clay blog edited by Heather Powers: Polymer Clay @ CraftGossip.com.
Seriously, there are so many great polymer-related blogs out there, and more popping up all the time, that I can't keep up with them all! I'm already way behind on my blog-reading, as it is. But I can't resist, so I'll be adding this to my reading list, too... You guys really don't want me to have time to play with the clay, do you? ;o)

Ok, got to go medicate the dog. . . (No, really. Daisy needs her pills. She's epileptic, poor thing.)

Wednesday, August 15, 2007

Various & Sundry

A little bit of this, a little bit of that. . .

First-- a little extra information on the faux ceramic technique. (If you've looked at the Polymer Clay Web forum thread on this topic, this won't be new.) I'm still learning how the Kato Liquid works, compared to TLS. One thing I've always heard (and have proven to myself to be true) is that if you hit the Kato Liquid with a heat gun or embossing gun after curing (or bump up the temperature in the oven, briefly), you'll bring out the greatest clarity. It's pretty amazing how well that works. It takes a little while for me, using my little embossing gun, so be patient. Just keep moving the heating tool around, and eventually you'll see a big improvement. Once it starts to happen, it's fast.

Well, anyway, I knew about the heat gun improving the clarity. What I didn't know is that it also changes the finish of the Kato Liquid. I've done a comparison of pieces cured normally and those that I've given the "extra heat treatment", and there's a definite difference. The "extra-heated" ones have a much shinier finish than the others. (I hope this doesn't mean that I've been under-curing the others. . . I'll have to recheck my oven's temperature, just to be on the safe side.)

Here's a photo that (kind of) shows what I mean:

All of these pieces have a Kato-based glaze, but the top two were heated with a heat gun, while the bottom two were not. (The bottom two have more of a sheen than you can tell from this photo, but it's much softer than the shine on the other two.) I think both effects are attractive; it just depends on whether or not you want lots of shine.

___________

While looking around at Parole de Pâte the other day, I was very impressed by this entry. It's been put through a translator, from French to English, but those translating programs leave something to be desired. The translated version refers to powder (Pearl-ex) and resin. Based on the comments, I think they really did use resin (two-part epoxy, such as Envirotex Lite) for the clear coating over the powders, though at first I wondered whether the translating program got that part wrong. (I thought maybe the French word for resin tricked it, as so often seems to happen with these programs.) In any case, I decided to use Liquid Kato, as I'm more familiar with that medium and knew I could get it pretty darn clear with a heat gun.

There's still the slightest bit of a haze in one or two parts of this heart, but it's not bad at all, and I might be able to get it to go away, if I gave it a little more heat. (You could probably also eliminate this problem by doing two thinner coats and clarifying between them.)


It's a simple technique, but the result is very nice. I'm going to have to give this one another try. :o) (And don't forget to follow that link and look at the photos on the other site. They're gorgeous!)
___________

There's another (more recent) topic on Parole de Pâte that also interests me. It's a new take on Jennifer Patterson's "Hidden Magic" technique. Very pretty!

___________

A few days ago, a customer asked me if I "do pizza". Not yet, but it had been on my wish list of mini foods for a long time. I'd been drooling over Milo's mini pizzas only days before-- we got pizza over the weekend-- and now comes this question. . . It must be fate, right? ;o) I decided to give it a try:

There are a few more mini pizza photos on my flickr.

It was rather time-consuming. Miniatures often are, particularly when they're comprised of detailed layers-- and of course I had to figure everything out as I went along, so that took some time. But it was fun, and I definitely see more mini pizzas in my future. :o)

Oh, and for those interested in size, each slice is roughly an inch long. Way too big for 1:12 scale, but ok for "Barbie scale" (assuming that your Barbies like large slices of pizza). Since they have eye pins sticking out of them, I suppose it's obvious that they're really meant more for jewelry than doll houses. (g)
___________

Tuesday, August 07, 2007

Faux Ceramics

A while ago, I posted a link to a blog that featured lots of photos of beautiful ceramic pendants and charms. If you missed it before, or have forgotten about it, here it is again: http://bijouxdiva.canalblog.com/
There are links to several albums of "the Diva's" work along the right side of the page.

Those photos-- the luxurious glazes-- reminded me that I'd been wanting to try my hand at a faux ceramics effect. So I did-- and it was fun! :o)


Go to my Flickr account to see a few more photos of my first attempts. I also have a new batch waiting to be properly photographed.

It was interesting to note, during those first tries, that some of the colors I was least enthusiastic about to start with turned out to be my favorites. You never can tell about those things, which is why it's so important to experiment and step outside of your usual routine (as I need to remind myself from time to time). For instance, if I stick to the same color schemes every time, I'll never learn about the other combos that I could be enjoying.

It was also amusing that my favorite texture tool wasn't a texture sheet-- or a stamp. It was something I bought, but I only paid .25 or .50 for it (can't remember which it was, now), and it wasn't even meant to be used for applying texture. It was originally a medallion on a necklace at Claire's, but it was so huge that it made a hideous pendant, which is probably why it was on sale. (g) I bought it with texturing in mind, though, and it was definitely worth the price!

Anyway, I've put up a tutorial for the technique I used. It's nothing very complicated, and I like the fact that it doesn't require much "finishing". Well, you might want to do some extra finishing to yours. . . and I might give one of them a sanding and power-buffing, sometime, just to see what happens. . . but they look perfectly fine as they are, I think.

Here's the link: Faux Ceramic Pendants Tutorial

If you like it and give it a try, feel free to stop by this faux ceramics thread of our forum and post a picture or two-- and a link to your own blog or Flickr albums. :o)

Sunday, July 29, 2007

Kato's "New Opal"

It's high time for another post. Let's see. . . what can I post about?

Well, here's something:
I tried Donna Kato's "new opal" last week. I've made the opal sheet, but so far haven't done anything with it, beyond cutting it. The results were somewhat disappointing. Oh, it looked ok, I guess, but it was much more brittle than I'd expected.

First, I had a little trouble getting it off the tile. It wanted to crack apart, until I slid a tissue blade underneath to gently pry it up until I could get a good grip on it. Then, when I tried to cut it, the brittleness/crumbliness made things difficult, too.

It's hard to tell much for certain from photos, but the pictures in the tutorial-- and the fact that in her gallery, she's used this faux opal sheet to cover a slightly curved cabochon shape-- look to me like hers were more rubbery and/or flexible than mine turned out.

I can think of a couple of possible reasons for this, right off-- and there may be even more.

First-- I wasn't using the same type of flakes used in the tutorial. I suppose this might have affected my results in more than just appearance. I have yet another brand of flakes (still not the one used in the tutorial, though) that I can try next time, to see if this makes a difference.

Second-- I wonder if I didn't make my sheet thin enough and/or get my mix right. Too many flakes, not enough liquid clay. Ms. Kato describes the correct consistency as being like oatmeal. Unfortunately (in this one instance, at least), I'm not much of an oatmeal eater, so this was a bit of a guessing game for me. ;o)

The tutorial indicates putting the cured and cut opal sheet on top of a base of regular clay. In this step, you have to choose your clay color with care, because some of the base shows through. Well, with my sheet, you can put it on whatever you like, 'cause ain't nothin' gonna show through that sucker. (To put it elegantly. (g)) This is probably another indication that my proportions weren't right and I didn't smoosh it down thinly enough.

All in all, rather disappointing, though I can still try to use the pieces did manage to cut out. I just was expecting to have so much more control over the shapes I could cut from it. (That was one of the reasons I was so excited by this technique.) I suppose one mustn't expect success on the first try with every technique, and once I get this one "down", I have a few twists I want to put on it.

__________________________

Random bit of nothing:
I daren't be explicit, for fear of inciting "flames". . . and of becoming some milder form of a pariah (though, honestly, some days I already feel like one, in some of these silly groups!). . . but I need a vent for my annoyance, even if it's just a muffled, ambiguous little rant on my own personal blog.

So-- You know how "a little knowledge is a dangerous thing"? Well, "a little knowledge" has got nothing on "a (very) little power". And. . . I think that's all I'll dare to write here, after all. I'm moving the rest of what I was going to say to an even less public place than this 'umble 'ittle blog. ;o)

Sunday, July 15, 2007

Updates to Polymer Clay Web

I'm finally learning how to update Polymer Clay Web all on my own, rather than just working on the copy and waiting until my husband has a chance to build the corresponding pages. (I mean, he is a web designer, but even web designers need a break sometime, right? ;o)) I find that the "new to me" programs I'm using aren't really all that more complicated than the ones I've been using for a few years, which is reassuring. I hope my new gain in computer confidence will lead to a steadier flow of additions and improvements to the page, in the near future. :o)

Speaking of additions, there's a new tutorial up-- Marble Picture Pendants.


The basic idea behind the tutorial isn't very complicated, and even someone completely new to clay should have no trouble with it. (If you do, though, there's a thread in the forum where you can ask for help. Now that I'm going to stop ignoring the forum, that is...) With this method, even those who are too scared of (or confused by) image transfers to attempt them, yet, can take a photo or "found image" and turn it into a little pendant.

Saturday, April 14, 2007

Instructional video clips

I can usually follow a written technique fairly well, but I always prefer tutorials/lessons with lots of clear photographs. If the photos are good enough, you sometimes don't even have to read the instructions! (Not that I'd recommend that, of course. You never know when the author might place a crucial bit of information or a time-saving hint in amongst the directions.)

So if photos are great, then moving pictures must be even better, right? ;o)

For those who prefer to see a technique demonstrated from start to finish, but who don't have access to a polymer clay class, there are instructional videos and DVDs available. Many can be easily ordered on-line. Now, they're not cheap, but if you learn best by seeing the process in real time and hearing instructions, rather than reading them, a DVD might be worth the money.

Before you place an order, you might want to check the following places:

First, see if your local library system has any instructional videos or DVDs. If not, ask your librarian about interlibrary loans. You may be able to request DVDs from other libraries-- sometimes for a a small fee, sometimes for free. (In this case, it will be helpful if you know the titles of the videos or DVDs you want to borrow.)

Second, check to see if your area has a polymer clay guild. Most guilds charge an annual membership fee, but once you're a member, you'll have access to meetings with other polymer clay enthusiasts and a good source of information about opportunities to attend classes and participate in clay-related competitions and events. If the guild has a library of materials (you can ask before joining), you'll also be able to borrow these. (For example, here's a list of the Chicago Area Polymer Clay Guild's library contents and loan policies.)

Whether or not you're considering buying a video/DVD, there are a few clips available for free on-line. They're a good way to see if you're really interested in purchasing the DVD, and they provide some useful information in and off themselves. The ones I link to below are of a very decent length.

Here are a few available on MindStorm Production's website:

Assorted clay techniques:
Dotty McMillan makes pottery shard jewelry.
Donna Kato demonstrates marbled paper effect.
Donna Kato makes a flower cane.
Donna Kato creates a carved vessel.
Gwen Gibson creates a faux enamel pin.
Marie Segal demonstrates faux metal surface embellishments.
Marie Segal makes a sunflower cane.
Marie Segal creates a signature cane.
Lindly Haunani demonstrates her version of mokume gane.
Nan Roche demonstrates her loop-in-loop technique for necklaces.
Sue Heaser creates a gilded leaf pin.
Jody Bishel creates a butterfly pin.
Margene Crossan creates an embarrassed face.
Margene Crossan makes pants and a shirt for a boy.

Miniatures:
Lavonne Hoivik sculpts a miniature crocus.
Sue Heaser makes a miniature vase and jug.
Sue Heaser makes a miniature raspberry meringue dessert.

Children's techniques:
Kris Richards sculpts a bear.
Kris Richards demonstrates how to decorate with stamps.

There are also four video clips available here: http://www.polymerclayexpress.com/video_clips.html
These clips include the following:
--Terry Lee Czechowski demonstrating how to make a pillow pin.
--Gwen Gibson demonstrating how to use texture sheets with clay and how to treat the resultant textured clay with paint.
--Gwen Gibson demonstrating how to make an ultra-thin sheet of translucent clay and how to silk screen onto clay.
--Mari O'Dell demonstrating stamping clay and back-filling the stamped image with tinted liquid clay.

There are also a few clay-related clips from the on-line tutorials taken from Judy Belcher's segments on Beads, Baubles and Jewels:
Striped Polymer Charm Bracelet with Memory Wire
Tessellated Pendant
Stamped Mokume Gane Pendant
Filigree Purse with Polymer Clay Leaf Canes

Finally, if you're interested in video tutorials, you'll want to do a search, every so often, through the on-line video sites, such as http://video.google.com/ and http://www.youtube.com/.

Searching for "polymer clay" on these sites, today, I came up with the following interesting clips:
Polymer Clay Babies, by Debbie Garrity
Sculpting a Pig, by Wvclaylady
Silkscreen on Polymer Clay, by Daphne Hill
Color Scales in Polymer Clay, by Maggie Maggio
Sculpting a Torso in Polymer Clay, by Megan
How to Use Face Push Molds, by Maureen Carlson
DragonflyLane, videos by Christie Wright
Sculpting a Hand, by Aidamaris Roman

So, there you have it-- enough free video clips to get anyone inspired to make something with clay! ;o)

Thursday, March 22, 2007

Latest incarnation of "Crackled Inlay"--

Last Wednesday, I wrote that I was "varnishing" a few pieces done in my latest version of the "Crackled Inlay" technique. I think that a few of them came out very nicely-- so much so that I probably ought to see about putting a photo or two up on the tutorial page, just to show how the alternatives can look. (Honestly, right now I think they look better than any photos I have of the original technique.)

I could probably have done a better job of the photographing, but oh well. For now here are photos of the front and back (or back and front, depending on which side you favor) of my husband's favorite pendant from the batch:


Not absolutely perfect, maybe, but much better than I thought when I first tried cutting the sheet of clay with the metal leaf on it!

One thing I noticed was that some of the colors I used for this project seemed to change during curing. I started with four different shades of tinted translucent clay. (I used alcohol ink-- Adirondack and Pinata brands-- to tint the clay, but colored clay should work, too.) One was yellow, one orange, and the two last were slightly different shades of salmony pink. Now, I wasn't surprised that the pinks turned out to be the same after curing. I'd rather expected that that might happen. What did surprise me was that I could barely tell the difference between the orange and the yellow. The orange looks like a slightly darker gold than the yellow, while the two pinks look orange! It's not really a problem in this case, but it could be annoying under other circumstances.

I'll have to keep an eye on this in the future-- try to notice which ones shift the most and in what "direction", etc. I wonder how much of this is related to the ambering effect that sometimes occurs when you cure translucent clay? I wouldn't have thought that would be an issue in this case, as I used Frost (aka Premo Trans. w/Bleach), which I believe is supposed to reduce yellowing. Anyway-- something to think about for next time.

I still have some of the "metal-leafed" sheets of clay, so I'll probably give this project another try. I'd like to think ahead this time, though, and maybe try something a bit different. I'm not sure what, but I find that if I don't make a conscious effort to try something new, I generally end up falling into the same patterns of size, shape, and decoration style in my beads and pendants. Like anyone, I have my own personal comfort zone, and I naturally gravitate toward it if I'm not taking active measures to reach beyond it.

That said, I have a cold right now, so maybe I can be excused if I cling to what comforts me, these days. ;o)

Tuesday, March 20, 2007

Delicious mini foods in clay!

If you're as infatuated with miniature foods as I am, you need to visit Iris Mishly's blog. She has a great post with links to several mini-food related websites-- some of which were totally new to me.

It's such fun to admire these wonderfully realistic works of art. :o) I haven't had a chance to go through all of the pages in their entirety, but I've already picked up a tip from one of them. Let me see... Which one was it...?

There.... It was on Betsy Niederer's page of tips and tricks. She writes that instead of using cornmeal or semolina (which I've been looking for off and on, to no avail) to add texture to your mini foods, you should use partially cured and crumbled clay. (The cornmeal and semolina can degrade over time, and as you might imagine, that's not good.) I don't think I would've thought of that on my own, but it makes perfect sense. I can't wait to give it a try!

Also on Betsy Niederer's page-- Go here and just look at those hotdogs and fries. I'd swear they were real if I didn't know better. Her work is stunningly realistic. Of course, it's also meant to be art, so I'm sure it takes a lot of time to do. I also wonder whether or not certain pieces would be "wearable"-- or if they have unsealed chalks and things on them that would rub off if handled too much. Still, it's beautiful just to look at, and I think I'm getting some ideas for how to improve my attempts at mini food jewelry.

Thanks, Iris, for the inspiring links! Just what I needed to jump start my will to "go mini" again! :o)