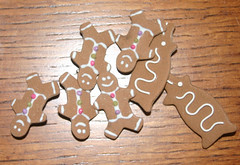
Whether you want to sell your work online, share it with others (without sending the actual object), or start a photographic record of what you've made, sooner or later you'll probably want to photograph your polymer clay creations.
Photographing polymer clay art seems simple enough-- until you actually try it. There are a number of common problems that can detract from the beauty of your work, but there are also solutions. You'll soon find that getting a great capture is as much of an art as the polymer clay techniques you used to create the gorgeous object you want to photograph! It takes time to learn and perfect your photographic technique, but with a few good pointers, you'll soon see dramatic improvements. What follows is a list of ten tips to get you started in the right direction.
Ten on Tuesday: Ten Tips for Photographing Polymer Clay Artwork
1. Learn how to use your camera.
Sure, it sounds obvious, but let's admit it: Most of us are so excited to try out our new toys that we don't always spend the time it takes to learn all the features. It can be intimidating, at first, but give it a try. Now is a great time to take out your manual and give it a closer look. If you know someone with camera know-how, ask them to show you some of what your camera can do. Experiment with different settings-- something beyond the automatic setting. Look for a message board or other online community where you can ask questions about your specific model.
If you have an out-dated camera-- or one that is strictly point-and-shoot-- now may be the time to consider shopping around for a new one. You needn't spend a lot of money to get a good digital camera, depending on what you want to do with it.
2. Be sure you have good lighting.
A photograph is captured light, so if you start out with poor lighting, you'll have poor photographs. I like to experiment with lighting-- take photos of the same object in a few different kinds of light. Sometimes I'm surprised by the results-- and with digital cameras, it doesn't cost much more than your time to take a few extra shots.
Natural light is almost always better than artificial light-- and it's free-- but you can also purchase special studio lighting. When photographing in natural light, it's usually best to have indirect light. In other words, you don't want the sun shining directly on the object. One way to achieve this is to use a diffuser. There are a number of ways to diffuse light. You can purchase a special box for this purpose (such as the EZ Cube), but you can also create your own "shield" from vellum, white fabric, or something similar. The idea is to let some light through to your object, but to soften it.
I made my own diffuser by cutting a hole in the bottom of an old gallon ice cream bucket. I simply place the bucket upside down over my bead (or whatever I'm photographing) and take the photo through the cut hole. The "frosted/clear" plastic of the bucket filters the light beautifully! (I first read this tip on PCC, but I can't remember whose it was. . .)
If you need to photograph with artificial light, you'll get the best results by using special lights in combination with a diffuser. (I don't know much about that set-up, myself, so I won't attempt to explain it. (g))
3. Use a tripod.
If you don't already have one, a tripod is a good investment. It doesn't have to be an expensive one, so long as it's easy enough to use that you'll actually use it. A tripod can help you cut down on blurry photos. Once you have your camera in place on a tripod, you don't have to worry about holding it the whole time-- and you more easily find the same spot time after time, if you're photographing a series of several similarly sized objects. A tripod also allows you to take longer exposures without blurring the photo. A longer exposure means that the shutter is open for longer than usual. As long as your tripod and camera hold still, this can give you a brighter image with a wider range of focus.
4. Get up close and personal.
If you're photographing small-scale objects like beads, earrings, or miniatures, you can easily "lose" your subject in the photo. A huge photo with a tiny bead in the middle isn't very impressive. Try to get as close to your subject as possible (without ruining your camera's ability to focus properly). If your camera has a macro setting-- or better yet, if you have a special macro lens-- now is the time to use it.
Macro lenses allow you to focus much closer to your subject than you can with a standard lens. For example, close-up photos of flowers and insects are usually taken with a macro lens. You'll find macro lenses at a variety of price points. You don't have to spend a fortune to get a macro lens that will take good photos of jewelry, beads, etc., but of course you can, if you'd like to. ;o)
If you don't have a macro lens and can't afford one right now, just get in as close as you can without sacrificing focus. (If you find, when you download your photos and see them big on the monitor, that they look a tiny bit blurry, go back and give it another try from slightly further away. Getting closer is no good if you end up with blurry images!) If your camera has a zoom function, don't forget to use that. Even if you can't fill up the whole photo with your subject, you can always crop the photo later. (I'll talk more about that later on.)
5. Be aware of your background.
So far, we've been putting all the focus on your subject, but it's also important to give some thought to the background. No matter how great your piece looks on its own, the right background can improve a photograph of it. Which background is "right" will depend on the subject (its color(s) and style), the purpose of the photo, and your personal taste.
For a very formal photo, you may want a solid black or white background-- or a gradient (look here for an example), which you can buy or print out on your home printer.
For something less formal, you can play around with brightly colored and/or patterned paper (scrapbook paper, for instance), fabric, leather, glass, brick, stone-- anything interesting that goes nicely with the color(s) of your subject. You can even give your subject a little "set". This is especially popular among some jewelry artists. A necklace draped around a vase-- earrings in the fold of a large, lushly green leaf-- a bracelet nestled on the silken folds of scarf. These "sets" usually are chosen for visual interest and/or to convey a certain mood (freshness, femininity, youth, etc.). Sometimes they show the subject in its "natural surroundings"-- i.e. a piece of jewelry on a woman's dresser, near her perfume.
Sometimes people like to include something in the photo for scale-- a coin, a ruler, or a grid to quickly illustrate the size of the object for sale.
The main arguments against using strong patterns, "sets", or rulers in photographs is that they may distract from the main subject. This is a matter of personal taste, so experiment to see what you like. If you have trouble deciding what looks best, show some friends a few options and ask which set-up they prefer. Try to notice the background/composition of product photos you admire. You may learn a few tricks that way, too. Eventually, you'll find the solution that meets your needs.
6. Clean up your act! ;o)
It's amazing what shows up on your computer monitor! All the dust, fuzz, lint, etc. that you didn't see when you were happily snapping photo after photo "magically" appears when you're looking at the pictures full size. Try to eliminate some of these annoying distractions by giving your work a quick polish-- or a puff of air-- right before photographing them. The same goes for your background and "set"; if they've been sitting out for a while, they can get dusty. (Some dust can be done away with during post-processing, but if there's much, it's a real pain-- not to mention that it can be tricky, if it's on the main subject of the photo.)
If your camera has a feature that allows you to zoom in and see your photo larger (on the camera, before downloading them to the computer), you can take advantage of that. It might save you the annoyance of having to completely redo a shoot.
7. Look at things from different angles.
If you're photographing your work to sell online, you'll often have the option of sharing more than one photo of each piece. In that case, it's a good idea to take photos from different angles.
Even if you're just photographing for your own sake, you may find that changing things around a little gives your photos a fresh look. Instead of taking every photo from straight on, try lowering the camera so that you have a different view of the piece.
If photographing with a view to sell the object, you'll want to provide as many different views of the piece as possible. Show the front, back, and sides of the piece. Consider taking a close-up of any special details that may not be obvious from a photo of the whole object.
Remember, one of the benefits of digital photography is that you can take as many photos as you like without having to pay to develop them all, so keep an open mind and play around.
8. Do a "stand-up job". ;o)
(Ok, I'll admit it; I have a weakness for puns! (g))
If you're photographing a special bead-- or any other object that doesn't easily stand just the way you'd like-- you can give it a little help. It depends on the look you want, but sometimes having the bead "just lying there" isn't exactly inspirational. Maybe you want it tilted back a bit with the prettiest side showing. Maybe you just want to give it a little more stability so that it's not constantly falling over or rolling around.
Different artists suggest a few different solutions for this problem. One idea is to use the teensiest bit of poster tack (the stuff used to hang posters on walls without nails or pins). Roll a tiny ball of the tack, then press your bead into it. With a little practice, you should be able to position your bead perfectly with none of the tack showing. You can also use "prop wax", which is made especially for this purpose. When photographing larger items, you may be able to prop them up against something-- anything sturdy, but small enough that it won't be visible in the photo. Experiment to find what works best for you.
9. Do a little post-processing (as needed).
Whether we know it or not, most of the images we see these days have been "processed", to some degree. The already-skinny model has had a few more pounds shaven away digitally; the covergirl's little blemish has been erased with a few clicks of the mouse. I'll leave you to form your own opinions on that subject (g), but in many cases, a little post-processing can improve a product photo.
Post-processing doesn't have to be intimidating. Once you learn the steps and create a routine of your own, it's easy. You'll need some type of photo-editing software. Adobe Photoshop (including the cheaper, more basic Photoshop Elements) is the best-known, but it's certainly not the only program out there. Your digital camera may come with a very simple program that allows you to crop and rotate photos, but you can also purchase photo-editing software. You can even find useful programs available for free online. (I don't know much about programs other than Photoshop, but in a recent blog entry, Christie mentioned one called GIMP. I'm sure you can find other options with a little research.)
Once you have your photo-editing software, you need to learn how to use it. Fortunately, you don't have to know every single function to get started. There are plenty of tutorials and message boards online where you can learn how to use most programs-- or you may be able to find an instructive book (maybe even at your local library). If you're very lucky, you might know someone who can give you a lesson in person. Just take your time, take notes, and remember that it will get easier with time.
The following are some of the functions I find most useful in Photoshop:
- Crop-- Allows you to select which portion of the photo you want to stay and which part should "go away". Particularly useful for shifting the focus back where you want it, if you couldn't get in close enough when you were taking your photos.
- Resize-- If you don't need your photo to be huge, there's no sense in keeping it huge. It just takes longer for the program to process; it also takes longer to upload. However, you don't want to make them too small. How big they'll need to be depends on what you'll be doing with them. For instance, at Etsy, 1000 pixels wide is suggested. If you're not sure what size you'll need for a certain application, you can probably find advice in the FAQ or a forum.
- Unsharp Mask-- There are a variety of ways to put a little extra sharpness on a photo. This is the one my husband (who just happens to be an Adobe Photoshop certified professional (g)) suggested that I use. (Note: If you find yourself relying too heavily on post-processing sharpening filters, it's time to work on your photo setup. Work to get a good, sharp focus when you take the photo, because no amount of post-processing can entirely compensate for a poor-quality photograph.)
- Cloning tools-- This type of tool (Clone Stamp Tool, Healing Brush, etc.) allows you to copy one part of the photo and paste it over another part-- or to take an average of the surrounding pixels and "paint" over in a similar color and texture. (Each tool has its own pros and cons. Once you've played around with them, you'll know which is best to use for a given task.) These tools are amazing time-savers. With them, you can remove small blemishes with a few quick mouse clicks. However, if you're using your photos to sell your work, you'll have to be careful to remove only photographic blemishes (dust, for example) and not something that is a permanent element of the piece (fingerprints and similar). Remember that your goal should be to make your work look as good as it truly does-- not to give a false representation of it.
- Color adjustments-- You can adjust the colors, brightness, contrast, etc. in a number of ways. (Look under Image>Adjustments.) Which is "best" depends on who you ask. Some people swear by Levels. Personally, I usually turn to Curves first (because that's how my husband taught me (g)), then maybe follow up with Color Balance (which is good way to pull down the yellow in artificially lit photos). You have the most control over your results if you manually adjust the colors, but if you're in a hurry or just aren't very particular about it, you can also use the auto adjust features, such as Auto Levels, Auto Color, and Auto Contrast. (There's also the option to select "auto" in the Curves box.)
10. Learn the tricks of the trade. (Study at the feet of the masters.)
We can learn a great deal from professional photographers. If you're feeling very ambitious, you can sign up for a class, but you can also learn a lot from a good book or from the many free tutorials, articles, and communities available on the internet.
Here are a handful of interesting links I found with just a few minutes of researching:
- Jewelry photography articles at Ganoksin.
- Information on photographing jewelry, beads, etc. (Yes, it's from a supplier of photographic equipment, but the information's free. (g))
- This one's about glass, but I think many of the tips are just as useful for polymer clay-- especially translucent pieces.
- Here's one about photographing jewelry in general.
- Don't forget about the GlassAttic page on photographing polymer clay.
- Rena Klingenberg's "Tips for Photographing Jewelry".
- Syndee Holt offers some photo tips on her website. Also, if you have access to old issues of PolymerCAFE, you can find a couple of related articles she's written for the magazine. Look for Vol. 5 No. 1 (Winter 2006/07) and Vol. 5 No. 2 (Spring 2007). There may be more related articles in up-coming editions, because the second article is labeled "Part 2 of a series".
Isn't it wonderful how one hobby (polymer clay) can lead you into so many other interests? :o)
