Monday, March 31, 2008

Ten on Tuesday: Ten Uses for Acrylic Paint

The other day, pulling out the supplies to crackle some paint, I realized that I hadn't devoted a Ten on Tuesday to acrylics. Time to remedy that, because these fast-drying paints have so many uses in a variety of polymer clay techniques! Better yet, you can find them in any arts and crafts store at a wide range of price points. They're so abundant that there's a good chance you have some in your arts and crafts supply arsenal even if you're brand new to polymer clay.

Ten on Tuesday: Ten Ways to Use Acrylic Paint with Polymer Clay


1. Antiquing
To "antique" something-- whether it's made of polymer clay, wood, or another material-- is to give it an appearance of greater age. This is usually accomplished with a little paint.

Antiquing is most effective with a textured piece. Start with a cured and cooled piece of clay. Apply paint straight from the bottle/tube, covering the entire piece. (Use a color that contrasts with the color of the clay. Dark brown and white are common choices, but you can use any color you like.) Before the paint has had a chance to dry, wipe away most of it with a soft rag. (Try to find a clean, lint-free rag. Otherwise, the lint or dust from the rag can make a mess of things.) The idea is to remove the majority of the paint from the piece, leaving it only in the recesses. Grooves, nooks, and crannies should catch the paint, much as small amounts of dirt and oil remain in the hard-to-reach spots on true antiques.

Play around with it until you're happy with the results. You can continue adding and removing paint until you're satisfied. You can remove stubborn paint with a slightly dampened rag or even a light sanding. (I find a little alcohol is helpful, if water's not doing the trick.)

2. Highlighting
Highlighting is essentially the opposite of antiquing. Instead of trying to leave paint only in the nooks and crannies of a textured piece, you're trying to apply it to only the raised, uppermost portions of a design. This is commonly done with mica powders to emphasize a design, but the technique can also be used with acrylic paints.

Highlighting is not difficult. The most challenging aspect of the technique is patience. Experiment to find whether you have better luck using a paintbrush (perhaps a stenciling brush?) or a fingertip to lightly dab paint (in any color or combination of colors) onto clay (raw or cured). Try not to overload the brush/fingertip with paint, as this can lead to paint seeping down into the crevices. Just take it a bit at a time, tap-tap-tapping (and reloading as needed) until you're done. You can highlight as much or as little of the pattern as you like and can apply as few or as many layers (in different colors, maybe?) as you like.

3. Washing/Glazing
It seems that the terms "wash" and "glaze" are often used interchangeably. I tend to think of them as slightly different things. The main difference (in my mind) is that a wash is matte (almost chalky, even), while a glaze is glossy. However you think of them, here are two related uses for acrylics:

A wash is paint that has been thinned down using either water or an acrylic medium. (Using water to thin the paint can cause the wash to bead up on cured polymer clay. This makes it difficult to use, so some advise against adding water to acrylics. Feel free to experiment to find what works best for you.) Adjust the ratio to get your desired consistency. Use a wash to achieve a matte, translucent layer of color. You can apply multiple washes to build up layers of color to achieve just the right opacity. Let each wash dry thoroughly before applying the next.

You can create a glaze with acrylic paint by mixing a few drops into a little Varathane, Future, or a product made specifically for creating acrylic glazes. The resultant mixture will create a translucent layer of color that will dry with a shine. This type of glaze can be used to cover an entire piece or as part of an antiquing process. Multiple layers are always a possibility. Just give plenty of time for drying between coats.

4. General and Detailing
General painting on polymer clay-- that is, using a piece of polymer clay as an canvas or painting every inch of a piece with opaque paint-- is largely overlooked, but it is certainly possible. You can start with raw or cured polymer clay. (I'd suggest curing it prior to painting, in this instance.) Paint just as you would any other surface, allowing ample drying time between coats. If desired, you can pop a cured piece back into the oven to harden the paint.

Detailing refers to painting the small details in a piece, such as the eyes, lips, and cheeks of a face. A tiny brush and a steady hand are your best aids in detail painting. If you make a mistake, you can quickly remove the paint with a damp cloth. Take your time, and don't forget that you can apply multiple layers to achieve darker or richer colors. A few thin layers (with "dry-time" between each) is better than one globby, thick layer.

5. Tinting Solid Clay
Because polymer clay comes in such a variety of colors and can be easily mixed to produce nearly any color imaginable, there's not really a need to tint it with paint. However, there are some of us who like to try things whether they're necessary or not. ;o)

There are mixed reports on how well acrylic paint works for tinting polymer clay. If there's too much paint in the mix, it can lead to plaquing or maybe even bubbling. For faux effects-- particularly imitations of stone-- a little plaquing doesn't hurt. In fact, some people try to induce plaquing! General knowledge is that you shouldn't use too great a ratio of paint to clay, but I say it can't hurt to experiment. I suggest letting the paint dry on the clay before kneading it in. This should make less of a mess. Oh, and for the greatest bang for your buck, try tinting translucent clay. You can mix paint into opaque clay, too, but obviously it won't have as much impact as with translucent.

6. Dry Brushing
This is another of those techniques that work best on a textured piece.

To dry brush a piece, pick up a little paint on a stiff, flat brush, remove most of the paint by brushing the bristles over a paper towel, then lightly brush the piece, leaving just a hint of color on the raised portions of the design. You can go over a piece several times until you get the desired finish. Consider using different colors in separate applications.

7. Brocade, Faux Gold Leaf, and Faux Silkscreening
Donna Kato's most recently published book, The Art of Polymer Clay: Creative Surface Effects, demonstrates some lovely techniques involving acrylic paint-- faux gold leaf, Silkscreen effect, brocade effect, and pattern overprinting.

Even if you don't own the book and can't get your hands on a copy, you can still enjoy this tutorial based on one of her appearances on The Carol Duvall Show: Polymer Clay Painted Pendant (featuring the brocade effect).

8. Faux Stone
Several faux stone recipes call for acrylic paint. Of course many faux stones are finished with an antiquing of dark brown-- to give then that ancient look-- but in addition to that, black, brown and white paint in particular are used in techniques that replicate the layered or banded effect found in so many natural materials. Agate, turquoise, marble, and onyx are a handful of faux stones that use acrylic paint, for instance. (Check out this older blog post for links to some related tutorials.)

9. Mokume Gane
(I love this technique, and I've written about it on more than one occasion.)

Acrylic paint can be used in mokume gane with beautiful results. Metallic or iridescent paints are more commonly used than regular ones, but anything is possible. Paint is most commonly used in mokume gane slabs made of translucent clay, as this allows the paint to be seen to the best advantage-- but again, feel free to experiment. Simply roll and cut your clay to the desired dimensions, paint, and let dry. Stack the painted clay and proceed as usual for mokume gane. You can make your mg with several layers of the same color of paint, a variety of colors, or in combination with other materials (metal leaf, for instance).

10. Crackling (or Crazing)
This is another technique that I've loved since the first time I saw it.

This is a simple technique that yields beautiful veneers of clay that can be used in any number of ways. It's helpful to have a pasta machine, but an acrylic rod will do in a pinch.

Start with a uniform sheet of clay in any color. Black is a common choice, but don't be afraid to try something different. Skinner blends can create striking results, too. (Here's a little tip: Don't make this sheet of clay too thin. You'll be thinning it more later on.)

Paint the sheet of clay with your acrylic paint. Metallic or iridescent paint is generally used for crackling, but regular paint will also work. You can use one color over the whole sheet or combine a number of colors in stripes, dots, or random squiggles. Combining different brands of paint can make an interesting crackled sheet, as each brand crackles in a slightly different way. You can cover as much or as little of the sheet as you like. Allow the paint to dry thoroughly. (Trying to crackle before the paint has dried will only make a mess.)

Adjust the pasta machine to a thinner setting and feed the decorated sheet through. The paint should crackle in one direction. To crackle it in the other direction, too, turn the sheet, adjust the pasta machine down to an even thinner setting, and feed the clay through once more.

You can also create a crackled effect on polymer clay by using special products designed to create crazing in the paint on any object. You'll need a crackling medium (sometimes in one bottle, sometimes two formulas kept separated in a pair of bottles). These products create crackling through a chemical process instead of a physical process (such as the physical stretching of painted clay, as described above).

Things to consider:
  • These techniques work just as well with metallic acrylics as with regular acrylics.
  • Some paints' colors can bleed into the surrounding cured clay, over time. This seems to be a problem particularly with red. Some people report success with sealing the clay before applying paint. Others say that this hasn't helped. It probably varies with the brands of paint and sealant.
  • Brands differ. Even colors within brands can vary, from one to the next, as to which ones crackle best, will/won't bleed into cured clay, etc. Experimentation is often the only way to find what will and won't work. I think I've had different results with the same bottle of paint on different occasions-- probably related to the time of year and humidity.
  • Some suggest that you cure painted clay to harden the paint. Some also suggest sealing. What's necessary will depend on what you're going to do with the finished piece. I've put a clay button with unsealed crackled paint through the washer and dryer a few times with no adverse effects (so far), but who's to say it won't come peeling off eventually? Use your own judgment. :o)
  • There are different opinions as to how different qualities of paint-- craft vs. artist quality-- perform for various tasks. Some prefer one brand, others another. The best solution seems to be to experiment until you find what works best for you.
Here are a couple of useful links:
http://www.angelslanding.com/pushmolds/paint.html
http://www.glassattic.com/polymer/paints.htm

Tuesday, March 25, 2008

Ten on Tuesday: Polymer Clay Buttons

Button, button, who's got the button? ;o)
Remember playing that children's game?

I have a few family members who are interested in polymer clay. They're already involved in quilt-making, and they're particularly focused on using polymer clay to make buttons to use as embellishments on their upcoming quilts.

Until the last week or two, I hadn't really made buttons before (except for a couple to use in jewelry), but I decided to look into the possibilities, since I may host a "clay day", sometime soon. To start myself off, I did a little research on the subject of polymer clay buttons. Here's some of what I found online:

Ten on Tuesday: Ten Links Relating to Polymer Clay Buttons

1. Sarajane Helm's page on polymer clay buttons
She's tested buttons made of Fimo Classic and Premo. Both held up well to washing (with detergent and warm water) and drying. (She even links to photos of the tested buttons, if you want to see the proof for yourself. (g)) One thing I noticed in the photos of the Fimo tests is that the mica powders seemed to have worn off after washing, even thought she finished them with Varathane. . . One other thing to note-- her buttons have acrylic shanks, but if you use a strong brand of clay, you should be able to make buttons with holes, too.

2. Layl McDill's Silly Milly Polymer Clay Buttons
She mentions (as I think I've heard before) that though pc buttons are "washable and durable", they may not be compatible with dry cleaning chemicals, so you should tell your dry cleaner about them beforehand, to be on the safe side. (Other resources simply state that dry cleaning is a no-no. . .)

3. Polymer Clay Button Tutorial from Crafty Daisies
This is a little video tutorial for making simple, chunky buttons. Personally, I probably wouldn't use Fimo Soft. From what I've heard and read, it's not the strongest brand of clay. (Fimo Classic, Premo, or Kato are all supposed to be stronger.) However, they might be fine if they aren't going to be under a lot of stress.

4. CandyFimoWebTR's polymer clay button video tutorial
Another video tutorial using Fimo (not sure if it's Soft or Classic) to make buttons. This tutorial uses cookie cutters to make some of the basic shapes.

5. CraftyGoat's (Angela's) blog post/video tutorial on button-making
Covers not only making button holes or adding a shank using a jump ring (a very common jewelry finding), but also making a mold from an existing button using Amazing Mold Putty.

6. GlassAttic page on buttons
The good old stand-by. ;o) Here are a few tips I found on this page:
  • For added strength, bake buttons longer than the minimum time recommended. (I do this for most stuff, actually, unless I'm really concerned about darkening. Of course, I also tent everything with aluminum foil to prevent darkening. . .) This means baking for at least 30 minutes no matter the thin they are. (I usually bump it up to 45 minutes minimum. As long as you're monitoring the temperature, it shouldn't burn even if you bake it for hours.)
  • To create a raised rim (or an impression in the center, depending on how you look at it), just press something smaller than the diameter of the button into the middle of the button. (As I read in a book recently, this can also help protect the thread, since it will sit lower inside the button and won't be rubbed against as much.)
  • Make your own shank with a "U"-shaped wire.
  • You can use a tiny round cutter (even something as simple as a drinking straw) for cutting holes, if you don't want to "poke" holes with a needle tool. (Poking may cause some distortion in the button. It's mostly a matter of preference.)
  • Holes can also be drilled after baking. (Use a hand drill or even just a small drill bit.)
  • "Some one suggested using two holes, angled inward toward each other (rather than straight up and down) to decrease the stress on the clay between the holes.... mostly important if the buttons will actually be used as buttons (rather than being decorative)" (Would that really make much difference? It might be worth a try if you're planning on using the buttons in a higher-stress application.)
  • Washing and drying (even under high heat) should be ok-- just don't dry clean. (Of course, to be on the safe side, it's best to test one or two before committing to a larger project. Sew the button to a rag or something, then toss it in with your regular washing. After it's been washed and dried a few times, you should be able to see how well it'll hold up.)
  • Buttons may even become a little polished with repeated washing and drying.
  • One person reports that buttons antiqued with acrylic paint hold up to washing.
  • Sarajane Helm notes that metallic and mica powders, even if sealed with Varathane, tend to wash off. But if you make a glaze/stain of paint or Pearl-ex mixed with Varathane, they hold up better. (Must be something to do with the layer of powder preventing a good "connection" between the clay and the sealant.)
  • Alcohol-based inks left unsealed on buttons holds up in the washer and dryer. (But be aware that they'll wipe off with alcohol.)
  • Future as a sealant may not work well if you use strong detergents or bleach. It can come off.
7. Creative Kismet's (Regina Lord's) button bracelet tutorial
This one's not so much for making buttons to use for traditionally button-y purposes ;o) but it's pretty cute!

8. Polymer Clay Button Cover tutorial by Michelle Ross
Step-by-step for adhering polymer clay slices to metal button cover blanks. Could be useful if you wanted to use your buttons on something that had to be dry cleaned.

9. Polymer Clay Button Cover tutorial by Donna Kato
Another style of button covers.

10. Button hole positioner, by Lisa Clarke
The link above takes you to a photo of this handy tool, and you can read about it (and some other tools) on this blog entry. If you're going to be making lots of buttons with a particular shape cutter, this is a great idea for getting the holes in the same place on each and every button.

These links (and a couple of pages in Sue Heaser's new Encyclopedia of Polymer Clay Techniques) helped me learn most of what I needed to know about polymer clay buttons-- plenty enough to get started. It's always such a satisfying feeling when two or more of your interests coincide. Now I'm all geared up to make some polymer clay buttons to use in my next sewing project! :o) (They can also be cute in scrapbooks, altered books, and other arts and crafts that use mixed media.)

Happy button-making! :o)

Wednesday, March 19, 2008

Gorgeous moss-green earrings!

I love these earrings Eliz'art recently posted on her blog. They remind me of the results I got playing around with the faux marble technique in Carol Blackburn's bead book, only these are done up in such wonderful mossy greens! (I am a huge admirer of mossy greens. (g))

Ok, that's all for now. Just had to share the pretty picture. :o)

Etsy Love Stories

I know that a lot of folks (myself included) are selling their polymer clay (and other) creations on Etsy these days. I knew it was a great place to sell or buy unique handmade items, but it never occurred to me that it could also be a way for single folks to meet and fall in love!

Check it out here: Etsy Love Stories.

I really shouldn't have been surprised. My husband and I met online, too-- on an e-mail list dedicated to discussing books by a favorite author. It just goes to show that you never know what's going to happen when you wander around on the World Wide Web. ;o)

Tuesday, March 18, 2008

Latest Issue of Polymer Cafe

Friday afternoon, the latest issue of Polymer Cafe arrived. It doesn't seem long since the last issue came out-- a pleasant surprise in my mailbox, now that the magazine has made the switch from four issues a year to six.

Lots of eye candy in this one-- including plenty of gorgeous photos of Kathleen Dustin's work (like the piece on the cover) and a gallery of work by the authors of projects in this issue. There are a couple of sculpting tutorials and a few jewelry projects, as well as a tribute to Joan and Mike Clipp (the initial publishers of the magazine) and the other regular features. Oh, and quite a few ads. ;o) I actually like seeing some ads-- gives me an idea of what else is out there. I particularly like the ones that have nice photos of potential projects.

So now I have a little more clay-related reading material! ;o)

Ten on Tuesday: Polymer Clay Eggs

It's nearly Easter again, already! When I was growing up, my sisters and I always looked forward our annual Easter egg hunt at home (and then two more with cousins from each side of the family!). Most of the eggs we hunted were made of colorful plastic, but there was always one "prize egg" for each child, holding a little extra gift instead of the usual candy. In early years, the prize eggs were a shiny silver (still plastic)-- later they were tiny egg-shaped tins.

Those eggs came out of storage just once a year, but decorated eggs needn't be restricted to Easter celebrations. You may have heard about (or even seen in museums) the beautiful Fabergé eggs made of precious materials, for instance. While you may not be able to afford an egg covered in gold or rubies, if you're handy with polymer clay, you can create your own decorative eggs.

Practically any technique can be applied to clay-covered eggs, from mokume gane and thinly sliced canes to mosaic and mica shift. It's mostly a matter of inspiration. Here are some photos to give you an idea of what is possible:

Ten on Tuesday: Ten Photos of Polymer Clay Eggs
You can find more eggs in many of these photo streams. :o)
  1. Eggs (set), by polymer_woman
  2. Polymer Clay Covered Eggs (set), byChicki2008
  3. Faux Chocolate Egg, by hambacreations (Amy)
  4. Polymer Clay Egg, by wabi-sabi creations (Pamela Franceschetto)
  5. Birds Nesting Eggs, by divadea (Alissa Plant)
  6. Feathered Egg, by Jael of jaelsjewels
  7. Egg, by Ruth Tarragano
  8. Floral Egg, by polymerclaycreations (Angela Hickey)
  9. Egg Ornament, by made in lowell (Liz)
  10. Sheep Knoll Red House, by Folk Art from the Heart
Ok, I found more than ten, and this time, since it's so easy to add a few more links, I decided to add a bonus of five more Flickr finds. Aren't you EGGstatic? ;o) (Sorry, I can't resist puns.)
  1. Cat Egg, by Muselover (Ann)
  2. littlegod1, by Leslie Levings
  3. GRAMPS, by Gourd Girl
  4. Polymer Clay Egg, by WigglebuttClay
  5. Crimson Fire Egg, by ssneed
Feeling inspired by all those egg-cellent examples? (Again, sorry. (g)) If (like me) you've never made a clay-covered egg before, you may need a few pointers. You can find some helpful information on this page of GlassAttic. Here are a handful of other related links:
Happy claying! :o)

Tuesday, March 11, 2008

Ten on Tuesday: Springtime Palettes

I don't know what the weather's like where you live, but around here, it's starting to feel more and more like spring. When that happens, my thoughts gravitate toward Easter egg pastels and the fresh greens of baby plants.

If your home town is still facing weeks of bitter cold, maybe you need a boost of cheery color even more than I do! And for those of you in the southern hemisphere. . . Well, any time's a good time for a springtime palette. (g)

Ten on Tuesday: Ten (or so) Springtime Palettes

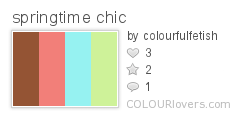
1. springtime chic--
I'm mainly drawn to the apple green and aqua/robin's egg blue combo (I have a real thing for those colors, it seems), but I think the addition of the coral pink and warm brown is nice, too. This combo is cheerful and gives a nod to classic springtime pastels, but it's not "plastic Easter egg"-y, if you know what I mean. (g)
springtime chic

2. Lady Beetle's House--
Here's something a bit brighter. Those greens paired with peach and berry hues look sweet to me. I can almost taste fruit-flavored candy!
Lady Beetle's House

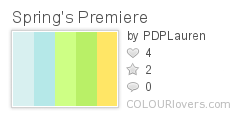
3. Spring's Premiere--
This palette looks like a sunny day to me. I love how simple and fresh it is. It reminds me of clean laundry flapping on the line-- little lambs frolicking on the lawn-- little puffy clouds drifting lazily across a baby blue sky. . . Well, you get the idea. ;o)
Spring's Premiere

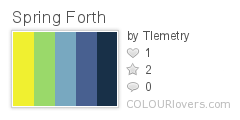
4. Spring Forth--
This one starts from a similar place as the last one-- the classic combination of yellow, green, and blue-- but it progresses into darker shades of blue. For me, the darker blues take the palette from the sunny afternoon through the twilight and into moonrise (with a liberal sprinkling of stars and a soundtrack of frog song ;o)). Maybe to someone else they're a reminder that there can still be a chill in the air in early spring. . .
Spring Forth
Now that I look at this again, I'm getting some Starry Night (Van Gogh) vibes. Maybe not quite greenish enough in the blues, though. . .

5. spring1--
More yellow, green, and blue. I must not be the only one who loves these colors together. ;o) These are all pretty warm, I think, which is fitting for spring, I guess.
spring1

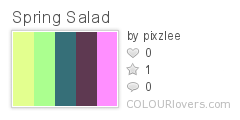
6. Spring Salad
These colors do remind me of a salad with lots of lovely, colorful lettuces. Taken on their own, some of these colors (the dark teal and especially the plum) may not seem particularly springlike, but who says you can't have dark colors in a springtime palette? Spring doesn't have to be all pastels (unless you like it that way, of course). A little variety can spice things up.
Spring Salad

7. springforward and spring spirits--
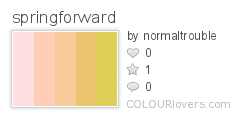
This palette is proof that you should "never say never" about a color. As fashion trends shift-- and as our perceptions shift with it-- we sometimes find ourselves liking colors we once thought we hated. If you had told "Teen Me" that I'd someday like "harvest gold" and tints of mustard, I probably would've laughed at you. ;o) While they still aren't my favorite colors in the world, I have to admit that they have a definite appeal in certain applications. For example, this gentle progression from softest pink to champagne and gold warms me right up.
springforward
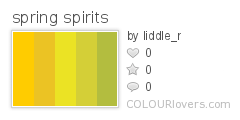
For a golden palette that's less delicate, how about this one?
spring spirits

8. spring velvet and spring--
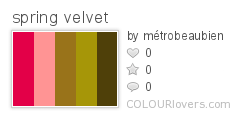
I'm a sucker for combinations of dark red and light green or pink and green. With these rather bronzey greens, the combo isn't at all childish or "1950s ice cream parlor-ish" (not that I don't like that style, too!). Instead, it has a certain maturity. Or maybe I'm just won over by the word "velvet". ;o)
spring velvet
Ok, I can't leave it at just one, so here's another "red and green" combo:
spring
(sighs) Ah, the perfect "complimentariness" of the spring green with the wine reds. . . Anyone else ever read The Blue Castle by L.M. Montgomery? I've always coveted Valancy's dress. . .

9. Spring Meadow and spring--
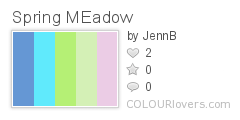
Here's something a bit more "rainbowy". I'm very fond of the softness of these colors in contrast with the medium periwinkle blue. . .
Spring MEadow
But if you like something a little bit bolder, try this one:
spring

10. vernal woods--
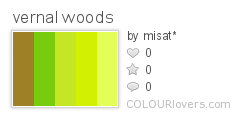
Let's close with something that puts most of the focus on green, the most abundant color of springtime. The ColourLovers site overflows with lovely palettes that demonstrate a very gradual shift in color. These generally appeal to me, but today, I was drawn to this palette with a little more variety.
vernal woods

Also on the subject of springtime color--
If you'd like to see what you're supposed to like this season ;o) have a peek at a couple of color forecasts for spring-summer 2008: Fire Mountain Gems and Pantone Fashion Color Report.

Monday, March 03, 2008

Ten on Tuesday: Ten Ways to Sign Your Work

We're probably going to have some bad weather in this area early tomorrow morning, so just to be on the safe side, I'm posting this a bit early. I hope your week's off to a great start! :o)

~ ~ ~ ~ ~

After pouring your heart and soul into a piece of work, wouldn't you like to "leave your mark" on it? Paintings are usually signed-- literature is printed with the author's name prominently displayed-- why not include your own signature, initials, or other personal mark on your polymer clay creations?

Obviously, this can be a bit tricky if you make small objects like beads-- and personally I never sign that type of thing-- but it can certainly be done. If you make larger-scale items, it's easy to find a spot to "sign" in one way or another. It's just a matter of deciding how to do it. . .

Ten on Tuesday: Ten Ways to Sign Your Work--

1. Sign with a pen.
Perhaps the most straightforward way to sign your work is to write your name directly on the object (usually on the bottom of the piece or another hidden, inconspicuous spot). What is less straightforward is what ink works best. Some pens (such as Sharpies) can bleed into the clay over time. This page at Glass Attic contains information on a variety of different pens and how they work with polymer clay.

Before you use a new pen to sign your name on a creation that took twenty hours of your life to make, I'd suggest running a series of tests on small scraps of clay. Be aware that it can take months to determine for certain how an ink will behave on the clay.

2. Sign with paint.
If you have a steadier hand with a paintbrush than I do ;o) , you may want to sign your work with paint. Just as with pens, there's the possibility of the paint bleeding into the clay-- particularly with red paint. Experiment on scrap clay to be on the safe side. It can take a while for the bleeding to become obvious, so date your tests and come back to them every so often.

One extra precaution you can take is to seal your cured piece prior to signing. Seal again (with Future, Varathane, etc.) to protect your signature.

There's more about paints and clay on this page of Glass Attic.

3. Carve it.
One simple way of signing your work is to carve your name or mark directly into the clay. If you do this prior to curing, you can use almost anything from a needle tool to a ball-ended stylus to do the "carving". The disadvantage to doing this pre-curing is that it's easy to distort the clay or mar your work. Carving your name after curing, on the other hand, will require that you use some sharp instrument. You may be able to use a craft knife, but if you have linoleum cutters (such as the set from Speedball), they're better for carving cured clay. (Be careful when you use any sharp tool. Practice using the linoleum cutters on cured scrap clay before trying them on anything special. Go slowly-- move the piece you're carving instead of the cutter-- and keep the cutter pointed away from you and your hands.)

Once you've carved your piece (and cured it, if you carved it raw), you can make your signature more visible by either antiquing it with acrylic paint or backfilling with a contrasting color of clay. (If you use clay, remember to cure the piece a second time!)

4. Transfer it.
I don't know that I've ever seen or heard of anyone doing this before, but I don't see any reason why it couldn't work. There are numerous methods of transferring images. Some require special papers and/or ink jet printers. For others, you need nothing more than a toner copy (think Xerox machine copy), clay (preferably in a light color), and water. Using your preferred image transfer method, you could sign your work with your name in any font you like, with a copy of your own actual signature, or with any "mark" or symbol you like. Just keep in mind whether or not your chosen method of image transfer will reverse the image. If it will, remember to mirror the image before printing it.

5. Make a signature cane.
I haven't heard much about this, lately, but some artists make a cane with their initials, logo, or other signature mark, then incorporate thin slices of it into their work. For larger pieces, you could work a slice of the cane into the design or embed it into the bottom of the object. Making a cane of this type may be a bit daunting for someone new to millefiori, but it's something to consider. This video starring Marie Segal includes information on making a signature cane.

6. Have a custom stamp made.
If you have the cash to spare, you can have your own designs made into a sheet of rubber stamps. You can easily fit a number of small "signature stamps" into one of these, with room to spare. Sarajane Helm has written about her experience having custom stamps made by Ready-Stamps. Use your custom-made signature stamp to leave an impression of your name or mark-- usually in an inconspicuous spot, such as the bottom. To make the signature more visible, you can antique it, backfill it, or highlight it with mica powder, acrylic paint, or rub-on wax.

7. Use a ready-made stamp.
Ok, maybe it's not ideal, but if you're short on funds, but already have an alphabet of rubber stamps, you can use those to sign your work. With larger stamps, you may have room only to leave your initials, but some stamps are small enough that you can fit in your full name. Don't forget the alphabet stamps you can find beyond the confines of the rubber stamp aisle of the craft store! The tiny stamp sets used in address stamps are great for polymer clay. You can also use metal stamps meant for marking serial numbers, etc., in metal surfaces.

If you're planning to sell what you make using rubber stamps, it's a good idea to check out the company's "Angel company policy". This will tell you whether or not it's legal to use the stamped image in artwork you intend to sell. There are variations in policy from company to company. Personally, I feel this should be much less of an issue if the stamp is used on the back or bottom of a piece purely to "sign" the work-- but use your own discretion.

8. Make a "2-step stamp".
You can make your own custom stamps out of polymer clay-- not only of your signature or "mark", but of anything you like! To make a "2-step stamp", start by carving your design. You can use raw clay or cured clay. Just be sure it's thick enough that you can carve your design without going through the bottom. Try to maintain a consistent depth throughout the design. If you need a guide to follow, you could either transfer an image of the design onto the clay or draw it by hand before carving. (If you carved raw clay, cure it before proceeding.)

Step two is to take a cast from your freshly carved mold. (Wait until it has cooled, if you just cured it.) Use a release agent and press raw clay into the cured mold (the thing you carved). This will create a "raised" version of your design, which you can cure and use as a stamp. If you notice that you didn't manage to keep the depth consistent in your carving, parts of your new stamp may be taller than others. You may be able to even things out a little by sanding it against a flat surface.

If you're very good with the carving tools, you may be able to condense this process by simply carving the raised design directly out of the first block of clay. This can be a bit messy, though, if your design is very detailed.

9. Make a "credit card stamp".
This is an idea I found in Donna Kato's latest book. She describes Jacqueline Lee's signature stamp this way: "To sign her artwork, Jacqueline Lee makes a mold from her name on a credit card and then presses raw clay into the mold. She then presses the clay to the piece." I haven't tried it yet, myself, but if your work is of a size to accept that type of signature, it seems like a pretty nifty idea!

10. Make an "extruded snake stamp".
Visit Polymer Clay Central to see Kathy Canuel's tutorial for a custom-made polymer clay stamp using an extruded snake of clay to make a quick and easy stamp. You'll need an extruder, some liquid clay, and regular polymer clay. The tutorial demonstrates making a word stamp ("Hope"), but you can use the same technique for any word, name or symbol you choose. In Kathy's examples at the end of the tutorial, you can see her personal "mark" for signing her work.

As you can see, there are methods to suit every style, budget, and application. I hope you've found one that you'd like to try. :o)

~ ~ ~ ~ ~

P.S. You know what they say about great minds thinking alike? ;o) Well, the day after writing this (I sometimes do these in advance, when I'm in a bloggy mood, so that I don't have to scramble on Tuesday morning), I saw that I wasn't the only one inspired by Kathy Canuel's tutorial. Angela (Crafty Goat) has also written about ways to make your own stamp-- including a variation on Kathy's technique. Some of our ideas were the same, but there are other techniques on her list that aren't on mine, so if you haven't already seen that blog post, you might want to head over there and have a look. :o)

Actually, there could be several blogs with posts similar to this, and I probably wouldn't know about it, at the rate I read blogs these days. . . (g) So if it ever looks like I'm copying your blog, please know that it isn't intentional. At the very least, I try to mention and link to the blogs I copy. ;o)

~ ~ ~ ~ ~

P.P.S. My temporary loss of internet access was only part of my recent computer-related woes. We also lost all our saved e-mail. I know that I had received at least one e-mail in response to my earlier post, "Any suggestions?". Unfortunately, I hadn't even had a chance to read it, so if that person sees this and is able to resend the e-mail, I'd appreciate it. I'm sorry for the inconvenience. At least everything is up and running again, now. :o)

Wednesday, February 27, 2008

Off-line!

We're having trouble with our internet connection, so until that gets cleared up, I may be quieter than usual. (Not that I've been all that chatty, lately, anyway, (g)) I have a connection today, but there was almost none yesterday. (Thus the absence of yesterday's Ten on Tuesday.) I hope things will be worked out before too long, though, and I should definitely have a post up next Tuesday.

In the meantime, if you haven't already seen them, here are a few blog entries I'd like to suggest:
  • Angela (CraftyGoat) has been writing a lot about tools and materials, lately. There are a couple of recent entries about repurposed tools (pumice stone and herb mincer) and one on using scrapbooking supplies with polymer clay. Angela's blog led to my next link. . .
  • Lisa (from Polka Dot Creations) gave readers a peek at some of her handmade tools, including a nifty idea for a button hole placer.
  • Elaine (TooAquarius) was inspired by Lisa's blog to share her idea for a handmade baking rack.
Lots of great ideas for handmade and "found" tools! More things to add to your polymer clay wish list! ;o)

I need to catch up on my blog-reading so I don't miss out on all this good stuff!

Wednesday, February 20, 2008

Any suggestions?

I'm always trying to add to my list of potential topics for Ten on Tuesday (and for that matter, regular posts, too). While brainstorming, I realized that I haven't ever asked for input from readers. So I'll do that now. ;o)

If you'd like to suggest a topic for a Ten on Tuesday-- or if you just have a nagging question relating to polymer clay-- please feel free to mention it in a comment-- or you can e-mail me, if you'd rather. :o) Your suggestions/questions can be about products, techniques, artists, tutorials you'd like to see-- anything that comes to mind. If you'd like to be credited for your suggestion, be sure to sign your comment. (Or if you e-mail me, but you'd prefer to remain anonymous, please mention that, also. (g))

I'll be the first to admit that I don't know everything about polymer clay, but I'll do my best to research unfamiliar topics and/or refer you to someone who might be able to help. :o)

In the meantime-- and for even longer, if no-one responds to this call for suggestions ;o)-- I'll continue to try to come up with topics on my own.

I hope everyone's having a great week!

Tuesday, February 19, 2008

Ten on Tuesday: Mosaics

Since ancient times, mosaics have been used to beautify the halls and temples men have built. Small pieces of stone, glass or other materials were painstakingly, strategically set in place to reveal a larger collective pattern or image. The art of mosaic design survives today, and for years, polymer clay artists have been getting in on the fun.

Ten on Tuesday: Ten Links Relating to Polymer Clay Mosaics

1. Polymer Clay Mosaic Tabletop, by Laurie Mika. Tutorial.

2. Polymer Clay Mosaics photoset, by salbug00. Photos.

3. Polymer Clay Mosaic Pendant, by DSDesigns (Debra). Photo.

4. Polymer Clay Mosaic Book (Cover), by Lisa Pavelka. Tutorial.

5. Freestyle Coaster Project, by Tina Barnes. Tutorial.

6. Create Mosaic Pendant, by Julie. Photo.

7. Liquid Clay Mosaics, by Karen Mitchell. Tutorial.

8. Mosaic Mirrors photoset, by Irma G. Photos.

9. Google BookSearch Excerpt from Totally Cool Polymer Clay Projects, by Marie Browning.

10. Here are a few more books worth checking out if you have an interest in polymer clay mosaics: Polymer Clay Mosaics, by Sue Heaser, Polymer Clay Mosaics, by Krista Wells, and Mixed Media Mosaics, by Laurie Mika.


Don't have the patience for mosaics? ;o) Here's Elissa Powell's Mosaic Cane Tutorial for a "mosaic-like" look without all the little bits and pieces.

Or you could do a "faux mosaic" like you see in this video by CandyFimoWebTR. Okay, technically, it is a mosaic, but most of the "tiny pieces" are simulated by filling in carved lines with grout. (You could also use opaque liquid clay or extremely softened regular polymer clay, in place of grout.)

Whether you tend toward the "shortcut" methods linked above or are inspired to try a time-consuming micro-mosaic à la Cynthia Toops, polymer clay is perfect for using in the mosaic design of your choice.

Sunday, February 17, 2008

Kato Polyclay -- Reformulation

I read today on Donna Kato's website that Kato Polyclay has been reformulated-- "gone green". The phthalates have been removed from the formula.

I'm no chemist, but I know that large amounts of phthalates probably aren't good for us. Because of concerns over the effects of contact with phthalates, more and more restrictions are being placed on their use in goods-- particularly products intended for children.

Donna writes that the new formula will be just as strong as the old one. It's even supposed to be easier to condition-- "but not too soft".

The packaging of Kato Polyclay will also be changing. Instead of the larger 3-ounce blocks, it will come in 2-ounce packages (like Premo and Sculpey III). For those interested in testing the new clay, there will be sample kits of four 1-ounce packages of different (but coordinating) colors. Oh, and Kato Clear Medium will be sold in colors. No idea which colors, but there's something else to be on the lookout for. (I wonder if the colors will be opaque or translucent. I guess we'll have to wait and see.)

I'm not sure when the new formula will hit stores-- or how the change in package size will affect the price of the product-- but it will be interesting to see what happens next. I've barely touched Kato Polyclay, myself, since I've mostly been happy with Premo (which is also easier for me to get), but if the new formula is easier to condition, I'll definitely have to give it a try.

On a related note:
On the Prairie Craft website, I found an update on the status of Donna Kato's upcoming book. I have no idea when it was posted, but the report indicates that the photos are all done and they're working to get final approval before sending it off to be printed. They haven't even chosen a title, yet, or set a release date, but it shouldn't be too long. (Still no mention of it on Amazon, but I guess that's not so strange, considering that it's not even named yet.)

If I remember correctly, this next book's supposed to focus mainly on millefiori. I haven't done much caning, to date. Every now and then I make a very basic cane-- usually for something relating to miniature food. Millefiori can be beautiful, but it simply hasn't appealed to me as much as other techniques. That said, if the new book is anywhere near as lovely as her last, I'm sure it's worth owning-- and maybe it will be the incentive I need to give caning some serious attention. There's a lot to learn!

Tuesday, February 12, 2008

Ten on Tuesday: Valentine Projects

There are only a couple more days until Valentine's Day-- but there's still time to whip up a little surprise for someone you love. Here are ten Valentine-themed tutorials/projects available for free online:

Ten on Tuesday: Ten Valentine Projects / Tutorials

1. Candice Mathewson's Valentine's Day Heart Cane. A pretty, lacy heart cane in red, pink, white, and black-- but of course you can make it in any colors you like.

2. If you aren't up to the challenge of the previous cane, Arlene Thayer's Simple Valentine Cane uses a heart-shaped cutter to achieve quick results.

3. Julia Sober's Valentine Hearts. Uses a lettering template to make larger-than-lifesize copies of the famous "conversation heart" candies. (I never did like the taste of those candies, personally, but I guess they're a useful tool for a shy Valentine-hunter. (g))

4. Carol Duvall's Polymer Clay Pins. Doesn't have to be "just" for Valentine's Day, but if you happen to have some Valentine-themed stamps (hearts, flowers, etc.), this is a quick and easy project. (Note that you'll also need Rub 'n Buff, acrylic paint, or mica powder-- anything to highlight the design of the stamps.)

5. Elissa Powell's E-Z Hearts. Again, not "just" for Valentine's Day, but since hearts are so popular this time of year. . . ;o) Here's one easy way to make a heart shape.

6. Christy Sherman's Glazed Heart Pendant. Another "not just for Valentine's Day" project. Shows another way to make a heart shape that isn't a flat cookie cutter shape.

7. Carly Seibel's Valentine Heart Beads. Textures, a shape cutter, mica powder, and teensy marbles-- all in one bead!

8. Sarajane Helm's Polymer Clay Hearts Project. Similar to the beads above, but a bit easier (mainly because they're decorated on one side only and don't involve the tiny marbles). The hearts can be turned into pins, earrings, decorations for cards, etc.

9. Jeanne Rhea's Polymer Clay Valentine Card Project for Young Children. As the title suggests, this project is great for little kids. Combines clay with paper crafts to create an adorable card that's sure to be treasured for years to come.

10. Karen Prince's I Love You Photo Holder. Also uses the shape of a hand, this time shaped into the sign for "I love you". Though this tutorial uses a hand-shaped cookie cutter, you could easily make a paper template by tracing someone's hand. (There are a few more Valentine-themed projects on the Sculpey site, too.)

I hope you all have a happy Valentine's Day this Thursday! And if there's no-one else around this year to be sweet to you, don't hesitate to treat yourself to a little token of self-appreciation. :o)

Friday, February 08, 2008

Beads of Courage

After reading on Tina's blog about the Beads of Courage program, I felt inspired to send them some beads, too.

Click the link above (and download this pdf) for specific information-- but in a nutshell, they distribute hand-made beads to children with serious illnesses (and their families). Each bead marks a step on the child's journey through treatment.

While I was still on my spiral bead kick, I made up a handful of larger-holed beads. (See the pdf; they need beads with at least 1/16-inch holes, preferably 3/32-inch holes. I found that that's larger than what I usually make in my beads.)

I also went through my stash of previously-made beads to find some with larger stringing holes. Now I just need to pack them up and get them in the mail.

Once I get over that little twinge of "are they good enough?"-- or maybe it's more "are they what the program wants?"-- it's a nice feeling, doing something kind for someone else. (And I figure that even if they can't use them in their program, they can still give them to a children's hospital for use in arts and crafts.)

I like this program because it's so easy. Bottles of Hope (another very worthy cause) is a bit intimidating to me. I haven't covered much with clay, before (and there's also the issue of where to get the bottles and how to distribute them, etc.)-- but I have plenty of experience making beads. All you need is some clay, postage, and the address.

If you have the means to do so, I hope you'll consider sending along a batch of your own beads. It truly does give you a wonderful feeling to make something for someone in a simple gesture of caring.

Studio Friday: The Heart of My Studio

Here's this week's prompt for Studio Friday:

"Where or what is the heart of your studio/creative space? Is it your desk or maybe a special piece of furniture, a window, a piece of art on the wall, your idea board, or one of your tools, a jar with ribbons on the shelf...? "

Part of me feels like the heart of my studio/craft room should be something "deeper"-- more meaningful, somehow-- than simply where I spend the most time when I'm there. . . But when I stood in the room and looked around, nothing really jumped out at me. My supplies are important, of course, but there are so many of them-- and they're so dispersed across the room-- that to say that my supplies are the heart of the room would be like saying the whole room is one big heart. (g)

I don't really have a "mascot" of any sort, either-- no muse-- no object that is my all-of-the-time inspiration source. I have an inspiration board, but honestly, I rarely touch it. I like to look at it from time to time, but it's more of a wall decoration than a constantly-changing canvas. When it comes down to the nitty-gritty, it's just me in a room full of craft supplies and the things I've created. (And quite a few books of sheet music, too, but mostly I just ignore them. ;o))

So I decided to be prosaic and say that the heart of my studio is where I do the work. Whether I'm claying, sewing, stringing beads, or scrapbooking, 99.9% of my time in this room is spent with my derrière settled on one of two identical chairs, such as the one pictured below:

(Notice how I tried to make it seem a little more artistic by getting down on the floor to snap the photo? ;o) Did it work?)

There's nothing inherently special about these chairs. They're just decently comfortable pieces of furniture. They came to me from my parents' house; I grew up sitting in these chairs. (Back then, they hadn't yet made the transformation from stained wood to aqua.) I didn't even make the strawberry-print cushions myself. They're hand-me-downs from my grandmother-- but they're comfy, and they serve the purpose.

Practicality with a dash of fun (aqua and strawberries)-- I think I can live with that as the "heart" of my room.

~*~*~*~*~

While looking at others' submissions for SF, I found a link to a very impressive studio. The colors are so beautifully soft-- but also playful. I love the green island.

Though I certainly don't need a room like that in order to create, a room like that sure is pretty to look at!

Polymer Clay Blogs

I'm rearranging my blog a little bit, today. My list of polymer clay-related blogs (formerly to the right) was taking up so much room that I decided to move it all into a single blog post. I'll put a link to this post over there, instead. :o)

I never use this list, these days, anyway, since I subscribed to them all over at my Google Reader account. This list is missing some of the blogs I discovered more recently, but it'd probably be a huge pain to figure out which ones aren't included here, so I make no promises to fix that. (g)

If you have a polymer clay-related blog (or know of one) that's not included, please feel free to comment. I'm always happy to add to my list, even if it takes me months (or years (g)) to catch up on my blog-reading. :o)

  • Ali di Libellula

  • All Things Metal Clay

  • Amanada's Musings

  • Ann de Rodegain Digne Dingue Donc

  • Art for the Heart

  • Artrepreneur

  • Artsy Clay

  • au fil de pates

  • Avec des Couleurs de l'Imagination

  • beadworx

  • block party press

  • Camille Young

  • C.A. Therien

  • Celine Passion

  • Chez Tulipesvertes

  • Clay Happenings

  • Crafts by Chris

  • CraftyGoat's Notes

  • Crafty Redhead

  • Créaprovence Création

  • Crearti

  • Créations MHB

  • Créations Rue Fédor

  • Creative Connections

  • Cristalline

  • dAmARa adalah

  • Desert Designs by Barbara

  • Des Nouvelles des Etoiles

  • domicreative

  • Dragonsglass

  • Du côte de chez moi

  • Dulcebella's Design

  • EdelWeiSS CréaTioN

  • Eliz'art

  • Enkhene

  • Ethno-Polymère

  • Eugena's Creations

  • Evarmonie

  • Facéties de Perles

  • FIMO BY IC

  • Hardflower Studios

  • heurebleue

  • Hidden Missives

  • Humblebeads Blog

  • Imagine Uncommon Things

  • Jael's Jewels Blog

  • Just Me and My Creations

  • Karina's blog

  • KC's Krafting Korner

  • KIWI Handmade

  • La Mélancolie du Caméléon

  • L'atelier de Trukabul

  • Laura's Blog

  • Le Blog de Dodo

  • Le Blog de Flo

  • Le Blog de Lilli Prune

  • Le Blog de Mamezelle Cat

  • Le Blog de Marie

  • Le Blog de Palatena

  • Le Blog de RERE

  • Le Laboratoire de Melle Cookie

  • Le Monde de Sysyl

  • Les Bidules de Sofie

  • Les Bijou d'Alienor

  • Les Bijou d'Edith

  • Les Bijou de Perlchen

  • Les Créations de Miss Zabeth

  • Les Fimoteries de Maniguette

  • Les Frivolités de Caty

  • Les Petites Manies de Sarajana

  • Les Petit Monde de Stéphanie

  • Libzoid

  • Lindly Talking Color

  • Liquorice Allosaurus

  • Made in Sassenage

  • Madeleine Songe

  • Many Parts

  • Mariane.S

  • Mill Girl

  • .:minicaretti:.

  • Molymer Clay

  • Mosaico

  • My Life with Polymer Clay

  • Mystical Ring

  • My Sweet Little Corner

  • NanjoDogz

  • Objets d'emotion

  • Oolong's Zoo

  • Overstimulated Undercaffeinated

  • Parole de Pâte

  • Pearls of Whimsy

  • Peguintrax's World of Whimsy

  • Perlenküche

  • Perlette

  • Petits Doigt Magik

  • Petit Poucet

  • Philadelphia Area PC Guild Reporter

  • Polka Dot Creations Blog

  • polyblog

  • PolyCréations

  • Polymer & Fimo Clay News @ CraftGossip

  • Polymer and Prints

  • Polymer Clay Bytes!

  • Polymer Clay Daily

  • PolymerClayFimo

  • Polymer Clay Notes

  • Polymer Clay Wizard

  • Polymeri Online - Iris Mishly

  • polymermania

  • Polymer Paula

  • Polymers et Oceans

  • Ponsawan's Tutorial Blog

  • P'tits Cailloux

  • Queen of Clay

  • Quilted in Clay Rambles

  • Red Daisy's Designs

  • Scott's Place

  • Sevy Création

  • Silastones

  • Small Stuff of Mine

  • Smashing Color: Maggie Maggio

  • SOHO Beads

  • Stef Créations

  • Studio Bijou

  • TADworks

  • Tatsuko

  • Tejae's Art

  • Tewee

  • The Crab

  • Tina T.'s Polymer Clay

  • Too Aquarius

  • Too Much Time

  • Tranche de Cane

  • Treasurefield

  • Violettafleur

  • Wanda's Designs

  • Wes Warren's Polymer Clay Garage
  • Tuesday, February 05, 2008

    Ten on Tuesday: Ten Mask-Related Links

    Apart from being "Super Tuesday", today is also Mardi Gras (aka "Shrove Tuesday" or "Fat Tuesday"). It's the last big hurrah before Lent, and here along the Gulf Coast, there will be plenty of celebrating going on today. There will be jazz music in the air (along with moonpies, beads, and other trinkets), purple, green, and gold everywhere, extravagant costumes, and parades meandering their way over city streets. There will also be lots of masks.

    In honor of Mardi Gras, then, I bring you ten links relating to polymer clay masks. Maybe they'll inspire you to try making a mask of your own, whether to wear or to decorate your home-- or both!

    Ten on Tuesday: Ten Mask-Related Links

    1. Saltandpaper/Natalie's Octopus Mask is a fine example of how some creative thinking can lead to an unexpected mask. Hallowed-Mask, by Michelle of Gabriel Studios, is another opera mask with a very unique form.

    2. Polymer Clay Tribal Mask Pendant, by Debra of DSDesigns. Photo of a mask-shaped pendant that has a great metallic finish. She has many more photos of mask-themed pieces, so be sure to browse!

    3. For a change of pace, visit TheoJunior's Flickr photostream, where you'll find unusual (and often disturbing (g)) faces/masks, such as Maori Mask.

    4. Check out the mask gallery on Linda Weeks' website. (There's even one with a Mardi Gras theme!)

    5. Michelle Davis Petelinz's masks, such as Matuko, are designed to be wall art. Some of them have a coordinating shadowbox; others in her photostream are attached to panels for display.

    6. DIY hosts Anne Igou's tutorial for a Polymer Clay Mask, originally shown on Craft Lab.

    7. Anne Igou's Leaf Mask tutorial was originally aired on the Carol Duvall Show.

    8. Here's yet another tutorial by Anne Igou, this time for a Polymer Clay Mask Barrette, originally on DIY's Jewelry Making.

    9. If you liked her mask tutorials (above), then check out the gallery of maskwork on Anne Igou's personal website.

    10. Sarajane Helm's website offers some pages devoted to polymer clay masks-- both full size and miniature. (Please note that there are links to more mask-related pages, at the bottom of that first page.) In case you haven't heard, Sarajane has a book coming out this summer-- The Art of Polymer Clay Masks.

    If you're still hungry for more photos of masks, search Flickr for "polymer mask". You'll find all the photos and artists I simply couldn't fit into my little list of ten. :o)

    Happy Tuesday, everyone, and laissez les bons temps rouler! ;o)

    Tuesday, January 29, 2008

    Ten on Tuesday: Photography Tips

    I'm a bit later than usual this time, but here's my weekly list of ten. :o)

    Whether you want to sell your work online, share it with others (without sending the actual object), or start a photographic record of what you've made, sooner or later you'll probably want to photograph your polymer clay creations.

    Photographing polymer clay art seems simple enough-- until you actually try it. There are a number of common problems that can detract from the beauty of your work, but there are also solutions. You'll soon find that getting a great capture is as much of an art as the polymer clay techniques you used to create the gorgeous object you want to photograph! It takes time to learn and perfect your photographic technique, but with a few good pointers, you'll soon see dramatic improvements. What follows is a list of ten tips to get you started in the right direction.

    Ten on Tuesday: Ten Tips for Photographing Polymer Clay Artwork

    1. Learn how to use your camera.
    Sure, it sounds obvious, but let's admit it: Most of us are so excited to try out our new toys that we don't always spend the time it takes to learn all the features. It can be intimidating, at first, but give it a try. Now is a great time to take out your manual and give it a closer look. If you know someone with camera know-how, ask them to show you some of what your camera can do. Experiment with different settings-- something beyond the automatic setting. Look for a message board or other online community where you can ask questions about your specific model.

    If you have an out-dated camera-- or one that is strictly point-and-shoot-- now may be the time to consider shopping around for a new one. You needn't spend a lot of money to get a good digital camera, depending on what you want to do with it.

    2. Be sure you have good lighting.
    A photograph is captured light, so if you start out with poor lighting, you'll have poor photographs. I like to experiment with lighting-- take photos of the same object in a few different kinds of light. Sometimes I'm surprised by the results-- and with digital cameras, it doesn't cost much more than your time to take a few extra shots.

    Natural light is almost always better than artificial light-- and it's free-- but you can also purchase special studio lighting. When photographing in natural light, it's usually best to have indirect light. In other words, you don't want the sun shining directly on the object. One way to achieve this is to use a diffuser. There are a number of ways to diffuse light. You can purchase a special box for this purpose (such as the EZ Cube), but you can also create your own "shield" from vellum, white fabric, or something similar. The idea is to let some light through to your object, but to soften it.

    I made my own diffuser by cutting a hole in the bottom of an old gallon ice cream bucket. I simply place the bucket upside down over my bead (or whatever I'm photographing) and take the photo through the cut hole. The "frosted/clear" plastic of the bucket filters the light beautifully! (I first read this tip on PCC, but I can't remember whose it was. . .)

    If you need to photograph with artificial light, you'll get the best results by using special lights in combination with a diffuser. (I don't know much about that set-up, myself, so I won't attempt to explain it. (g))

    3. Use a tripod.
    If you don't already have one, a tripod is a good investment. It doesn't have to be an expensive one, so long as it's easy enough to use that you'll actually use it. A tripod can help you cut down on blurry photos. Once you have your camera in place on a tripod, you don't have to worry about holding it the whole time-- and you more easily find the same spot time after time, if you're photographing a series of several similarly sized objects. A tripod also allows you to take longer exposures without blurring the photo. A longer exposure means that the shutter is open for longer than usual. As long as your tripod and camera hold still, this can give you a brighter image with a wider range of focus.

    4. Get up close and personal.
    If you're photographing small-scale objects like beads, earrings, or miniatures, you can easily "lose" your subject in the photo. A huge photo with a tiny bead in the middle isn't very impressive. Try to get as close to your subject as possible (without ruining your camera's ability to focus properly). If your camera has a macro setting-- or better yet, if you have a special macro lens-- now is the time to use it.

    Macro lenses allow you to focus much closer to your subject than you can with a standard lens. For example, close-up photos of flowers and insects are usually taken with a macro lens. You'll find macro lenses at a variety of price points. You don't have to spend a fortune to get a macro lens that will take good photos of jewelry, beads, etc., but of course you can, if you'd like to. ;o)

    If you don't have a macro lens and can't afford one right now, just get in as close as you can without sacrificing focus. (If you find, when you download your photos and see them big on the monitor, that they look a tiny bit blurry, go back and give it another try from slightly further away. Getting closer is no good if you end up with blurry images!) If your camera has a zoom function, don't forget to use that. Even if you can't fill up the whole photo with your subject, you can always crop the photo later. (I'll talk more about that later on.)

    5. Be aware of your background.
    So far, we've been putting all the focus on your subject, but it's also important to give some thought to the background. No matter how great your piece looks on its own, the right background can improve a photograph of it. Which background is "right" will depend on the subject (its color(s) and style), the purpose of the photo, and your personal taste.

    For a very formal photo, you may want a solid black or white background-- or a gradient (look here for an example), which you can buy or print out on your home printer.

    For something less formal, you can play around with brightly colored and/or patterned paper (scrapbook paper, for instance), fabric, leather, glass, brick, stone-- anything interesting that goes nicely with the color(s) of your subject. You can even give your subject a little "set". This is especially popular among some jewelry artists. A necklace draped around a vase-- earrings in the fold of a large, lushly green leaf-- a bracelet nestled on the silken folds of scarf. These "sets" usually are chosen for visual interest and/or to convey a certain mood (freshness, femininity, youth, etc.). Sometimes they show the subject in its "natural surroundings"-- i.e. a piece of jewelry on a woman's dresser, near her perfume.

    Sometimes people like to include something in the photo for scale-- a coin, a ruler, or a grid to quickly illustrate the size of the object for sale.

    The main arguments against using strong patterns, "sets", or rulers in photographs is that they may distract from the main subject. This is a matter of personal taste, so experiment to see what you like. If you have trouble deciding what looks best, show some friends a few options and ask which set-up they prefer. Try to notice the background/composition of product photos you admire. You may learn a few tricks that way, too. Eventually, you'll find the solution that meets your needs.

    6. Clean up your act! ;o)
    It's amazing what shows up on your computer monitor! All the dust, fuzz, lint, etc. that you didn't see when you were happily snapping photo after photo "magically" appears when you're looking at the pictures full size. Try to eliminate some of these annoying distractions by giving your work a quick polish-- or a puff of air-- right before photographing them. The same goes for your background and "set"; if they've been sitting out for a while, they can get dusty. (Some dust can be done away with during post-processing, but if there's much, it's a real pain-- not to mention that it can be tricky, if it's on the main subject of the photo.)

    If your camera has a feature that allows you to zoom in and see your photo larger (on the camera, before downloading them to the computer), you can take advantage of that. It might save you the annoyance of having to completely redo a shoot.

    7. Look at things from different angles.
    If you're photographing your work to sell online, you'll often have the option of sharing more than one photo of each piece. In that case, it's a good idea to take photos from different angles.

    Even if you're just photographing for your own sake, you may find that changing things around a little gives your photos a fresh look. Instead of taking every photo from straight on, try lowering the camera so that you have a different view of the piece.

    If photographing with a view to sell the object, you'll want to provide as many different views of the piece as possible. Show the front, back, and sides of the piece. Consider taking a close-up of any special details that may not be obvious from a photo of the whole object.

    Remember, one of the benefits of digital photography is that you can take as many photos as you like without having to pay to develop them all, so keep an open mind and play around.

    8. Do a "stand-up job". ;o)
    (Ok, I'll admit it; I have a weakness for puns! (g))

    If you're photographing a special bead-- or any other object that doesn't easily stand just the way you'd like-- you can give it a little help. It depends on the look you want, but sometimes having the bead "just lying there" isn't exactly inspirational. Maybe you want it tilted back a bit with the prettiest side showing. Maybe you just want to give it a little more stability so that it's not constantly falling over or rolling around.

    Different artists suggest a few different solutions for this problem. One idea is to use the teensiest bit of poster tack (the stuff used to hang posters on walls without nails or pins). Roll a tiny ball of the tack, then press your bead into it. With a little practice, you should be able to position your bead perfectly with none of the tack showing. You can also use "prop wax", which is made especially for this purpose. When photographing larger items, you may be able to prop them up against something-- anything sturdy, but small enough that it won't be visible in the photo. Experiment to find what works best for you.

    9. Do a little post-processing (as needed).
    Whether we know it or not, most of the images we see these days have been "processed", to some degree. The already-skinny model has had a few more pounds shaven away digitally; the covergirl's little blemish has been erased with a few clicks of the mouse. I'll leave you to form your own opinions on that subject (g), but in many cases, a little post-processing can improve a product photo.

    Post-processing doesn't have to be intimidating. Once you learn the steps and create a routine of your own, it's easy. You'll need some type of photo-editing software. Adobe Photoshop (including the cheaper, more basic Photoshop Elements) is the best-known, but it's certainly not the only program out there. Your digital camera may come with a very simple program that allows you to crop and rotate photos, but you can also purchase photo-editing software. You can even find useful programs available for free online. (I don't know much about programs other than Photoshop, but in a recent blog entry, Christie mentioned one called GIMP. I'm sure you can find other options with a little research.)

    Once you have your photo-editing software, you need to learn how to use it. Fortunately, you don't have to know every single function to get started. There are plenty of tutorials and message boards online where you can learn how to use most programs-- or you may be able to find an instructive book (maybe even at your local library). If you're very lucky, you might know someone who can give you a lesson in person. Just take your time, take notes, and remember that it will get easier with time.

    The following are some of the functions I find most useful in Photoshop:
    • Crop-- Allows you to select which portion of the photo you want to stay and which part should "go away". Particularly useful for shifting the focus back where you want it, if you couldn't get in close enough when you were taking your photos.
    • Resize-- If you don't need your photo to be huge, there's no sense in keeping it huge. It just takes longer for the program to process; it also takes longer to upload. However, you don't want to make them too small. How big they'll need to be depends on what you'll be doing with them. For instance, at Etsy, 1000 pixels wide is suggested. If you're not sure what size you'll need for a certain application, you can probably find advice in the FAQ or a forum.
    • Unsharp Mask-- There are a variety of ways to put a little extra sharpness on a photo. This is the one my husband (who just happens to be an Adobe Photoshop certified professional (g)) suggested that I use. (Note: If you find yourself relying too heavily on post-processing sharpening filters, it's time to work on your photo setup. Work to get a good, sharp focus when you take the photo, because no amount of post-processing can entirely compensate for a poor-quality photograph.)
    • Cloning tools-- This type of tool (Clone Stamp Tool, Healing Brush, etc.) allows you to copy one part of the photo and paste it over another part-- or to take an average of the surrounding pixels and "paint" over in a similar color and texture. (Each tool has its own pros and cons. Once you've played around with them, you'll know which is best to use for a given task.) These tools are amazing time-savers. With them, you can remove small blemishes with a few quick mouse clicks. However, if you're using your photos to sell your work, you'll have to be careful to remove only photographic blemishes (dust, for example) and not something that is a permanent element of the piece (fingerprints and similar). Remember that your goal should be to make your work look as good as it truly does-- not to give a false representation of it.
    • Color adjustments-- You can adjust the colors, brightness, contrast, etc. in a number of ways. (Look under Image>Adjustments.) Which is "best" depends on who you ask. Some people swear by Levels. Personally, I usually turn to Curves first (because that's how my husband taught me (g)), then maybe follow up with Color Balance (which is good way to pull down the yellow in artificially lit photos). You have the most control over your results if you manually adjust the colors, but if you're in a hurry or just aren't very particular about it, you can also use the auto adjust features, such as Auto Levels, Auto Color, and Auto Contrast. (There's also the option to select "auto" in the Curves box.)

    10. Learn the tricks of the trade. (Study at the feet of the masters.)
    We can learn a great deal from professional photographers. If you're feeling very ambitious, you can sign up for a class, but you can also learn a lot from a good book or from the many free tutorials, articles, and communities available on the internet.

    Here are a handful of interesting links I found with just a few minutes of researching:
    • Jewelry photography articles at Ganoksin.
    • Information on photographing jewelry, beads, etc. (Yes, it's from a supplier of photographic equipment, but the information's free. (g))
      • This one's about glass, but I think many of the tips are just as useful for polymer clay-- especially translucent pieces.
      • Here's one about photographing jewelry in general.
    • Don't forget about the GlassAttic page on photographing polymer clay.
    • Rena Klingenberg's "Tips for Photographing Jewelry".
    • Syndee Holt offers some photo tips on her website. Also, if you have access to old issues of PolymerCAFE, you can find a couple of related articles she's written for the magazine. Look for Vol. 5 No. 1 (Winter 2006/07) and Vol. 5 No. 2 (Spring 2007). There may be more related articles in up-coming editions, because the second article is labeled "Part 2 of a series".
    And of course there are many, many more just waiting to be found! Remember that the tutorial/article doesn't have to be written expressly for polymer clay artists. You can adapt many of them to suit your personal needs.


    Isn't it wonderful how one hobby (polymer clay) can lead you into so many other interests? :o)